The Desk Organizer – tutorial is a fantastic quilting project that combines creativity with functionality. If you enjoy sewing and quilting while also looking for ways to keep your workspace tidy, the Desk Organizer – tutorial offers the perfect opportunity to create a handmade solution that is both beautiful and useful.
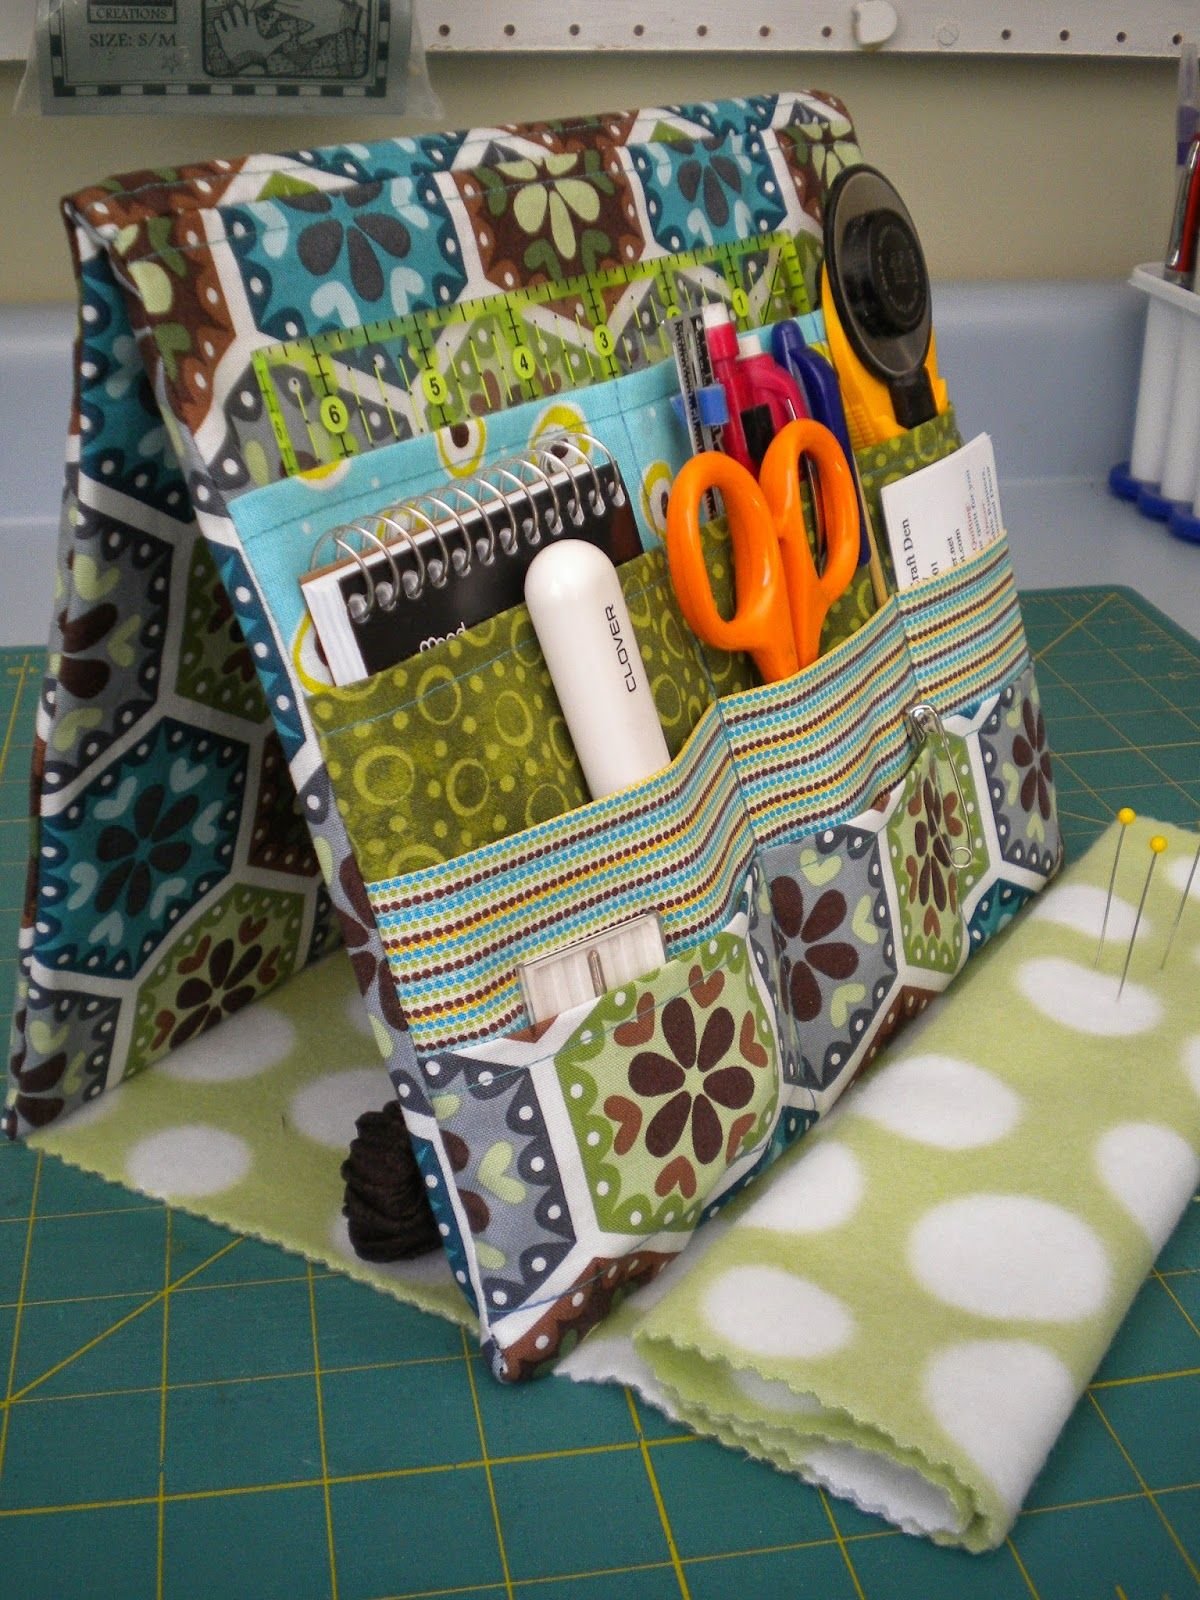
A well-designed desk organizer can transform any workspace. With the help of the Desk Organizer – tutorial, you can craft a quilted organizer that stores pens, scissors, notebooks, craft tools, and other small essentials in a stylish way. This project is ideal for quilters who appreciate projects that serve a real purpose in everyday life.
Another great advantage of the Desk Organizer – tutorial is its versatility. The design can be customized to match your workspace décor, personal style, or even your sewing room theme. Whether you prefer vibrant patchwork fabrics or minimalist neutral tones, this project allows endless creative possibilities.
1. Understanding the Desk Organizer – Tutorial and Its Benefits
The Desk Organizer – tutorial is designed to help quilters create a fabric-based storage system for desks and workspaces. Unlike plastic or metal organizers, a quilted desk organizer adds warmth, personality, and a handmade touch to any environment.
DISCOVER MORE FREE PATTERNS HERE!
One of the key benefits of following the Desk Organizer – tutorial is the opportunity to combine quilting techniques with practical design. The project typically includes quilted panels, pockets, compartments, and structured sections that hold various desk items securely.
Another reason why the Desk Organizer – tutorial is so popular among quilters is that it can be made using leftover fabric scraps. Many quilters accumulate beautiful pieces of fabric that are too small for large quilts but perfect for smaller functional projects like this.
This quilting project also helps improve important sewing skills. While working through the Desk Organizer – tutorial, quilters practice cutting, piecing, quilting layers together, and assembling structured fabric pieces.
Additionally, the finished organizer can be used in many different environments. It works perfectly on office desks, craft tables, study spaces, and even bedside tables for storing small everyday items.
Finally, handmade organizers make thoughtful gifts. A quilted desk organizer created with the Desk Organizer – tutorial can be a wonderful present for students, teachers, coworkers, or anyone who enjoys handmade items.
2. Materials and Tools Needed for the Desk Organizer – Tutorial
Before starting the Desk Organizer – tutorial, it is important to gather the necessary materials and tools. Preparing everything in advance helps ensure a smooth and enjoyable sewing experience.
The most important material is fabric. Quilting cotton works best for the Desk Organizer – tutorial because it is durable, easy to sew, and available in countless patterns and colors. Many crafters enjoy mixing multiple fabrics to create a vibrant patchwork look.
Batting is another essential component. In the Desk Organizer – tutorial, batting adds softness and structure to the organizer, helping the fabric hold its shape while protecting items stored inside.
You will also need a sturdy backing fabric or interfacing. This provides extra support and stability, ensuring the organizer remains upright and functional even when filled with tools and supplies.
Basic sewing tools are also required. These include fabric scissors, rotary cutters, rulers, pins, sewing needles, and a reliable sewing machine.
Thread selection is important as well. Strong, high-quality thread ensures that the seams in your Desk Organizer – tutorial remain durable, especially in areas that experience frequent use.
Optional materials may include decorative buttons, labels, elastic bands, or Velcro closures. These additions can enhance the organizer’s functionality and visual appeal.
3. Step-by-Step Overview of the Desk Organizer – Tutorial
The Desk Organizer – tutorial usually begins with cutting the fabric pieces according to the pattern measurements. These pieces will form the base panel, pocket sections, and structural sides of the organizer.
After cutting the fabric, the next step is assembling quilted panels. In the Desk Organizer – tutorial, this often involves layering the top fabric, batting, and backing fabric before quilting them together with simple stitch patterns.
Once the quilted panels are completed, the pockets are prepared. The Desk Organizer – tutorial often includes multiple pockets in different sizes, allowing the organizer to hold various items such as pens, markers, rulers, and scissors.
Next comes the assembly stage. The pockets are carefully stitched onto the base panel, ensuring they are evenly spaced and securely attached. This stage of the Desk Organizer – tutorial requires precision to maintain a clean and professional look.
After the pockets are attached, the sides and structure of the organizer are formed. Depending on the design, this may include folding panels, adding stiff interfacing, or sewing boxed corners.
The final step in the Desk Organizer – tutorial involves finishing touches such as binding the edges, trimming excess threads, and reinforcing seams to ensure durability.
4. Creative Design Ideas for Your Desk Organizer
One of the most exciting aspects of the Desk Organizer – tutorial is the opportunity to personalize your project. Quilters can experiment with different color palettes, fabric patterns, and decorative details.
For example, a bright patchwork organizer can add energy and creativity to a craft room. Using vibrant fabrics in the Desk Organizer – tutorial creates a cheerful workspace that inspires productivity.
Minimalist designs are also very popular. Neutral fabrics such as beige, gray, or soft pastels can create an elegant organizer that blends seamlessly into professional office environments.
Another creative idea is to design themed organizers. A floral-themed Desk Organizer – tutorial can be perfect for spring décor, while geometric prints create a modern and contemporary look.
You can also modify the pocket layout. Some quilters prefer larger compartments for notebooks and tablets, while others design smaller pockets for craft tools and stationery.
Finally, personalizing the organizer with embroidered names, labels, or quilted patterns makes the finished piece even more special and unique.
FAQ About the Desk Organizer – Tutorial
1. Is the Desk Organizer – tutorial suitable for beginner quilters?
Yes, the Desk Organizer – tutorial can be adapted for beginners. While it includes several steps, most techniques involve basic sewing and quilting skills.
2. What size should a quilted desk organizer be?
The size depends on your workspace and needs. Many versions of the Desk Organizer – tutorial are designed to fit standard desks while holding essential items.
3. Can I make the organizer using fabric scraps?
Absolutely. The Desk Organizer – tutorial is an excellent project for using leftover quilting fabric.
4. Do I need a sewing machine for this project?
A sewing machine is recommended because it speeds up the process and provides stronger seams, but some parts can be hand-sewn if necessary.
5. How can I make the organizer sturdier?
Adding interfacing, heavier batting, or additional quilted layers in the Desk Organizer – tutorial can increase stability and durability.
6. Can this organizer be used for craft supplies instead of office tools?
Yes. Many crafters use organizers made from the Desk Organizer – tutorial to store crochet hooks, sewing supplies, embroidery tools, and other craft materials.
Conclusion
The Desk Organizer – tutorial is a creative and practical quilting project that allows you to turn beautiful fabrics into a functional workspace accessory. By combining quilting techniques with smart design, you can create a handmade organizer that keeps your desk tidy while showcasing your sewing skills.
In this article, we explored the benefits of the Desk Organizer – tutorial, the materials required, the main construction steps, and several creative ideas for customizing the design. This project is perfect for quilters who want to make something both decorative and useful.
If you enjoyed learning about this project, we would love to hear your thoughts. Feel free to share your honest opinion, experiences, and suggestions. Your feedback helps inspire more creative quilting ideas and tutorials for the community. Happy quilting!

