DIY Bird and Branch – TUTORIAL is a beautiful and artistic quilting project that captures the elegance of nature through fabric and stitching. This pattern is perfect for quilters who enjoy combining traditional techniques with expressive, nature-inspired designs to create something truly unique and decorative.
One of the most appealing aspects of the DIY Bird and Branch – TUTORIAL is its storytelling quality. The image of a bird resting on a branch evokes calm, freedom, and connection with nature, making this design ideal for wall hangings, quilt panels, or meaningful handmade gifts.
In this complete guide, you will learn everything you need to create your own DIY Bird and Branch – TUTORIAL, including understanding the structure, choosing the best materials, following a step-by-step process, and exploring creative customization ideas.
1. Understanding the DIY Bird and Branch – TUTORIAL
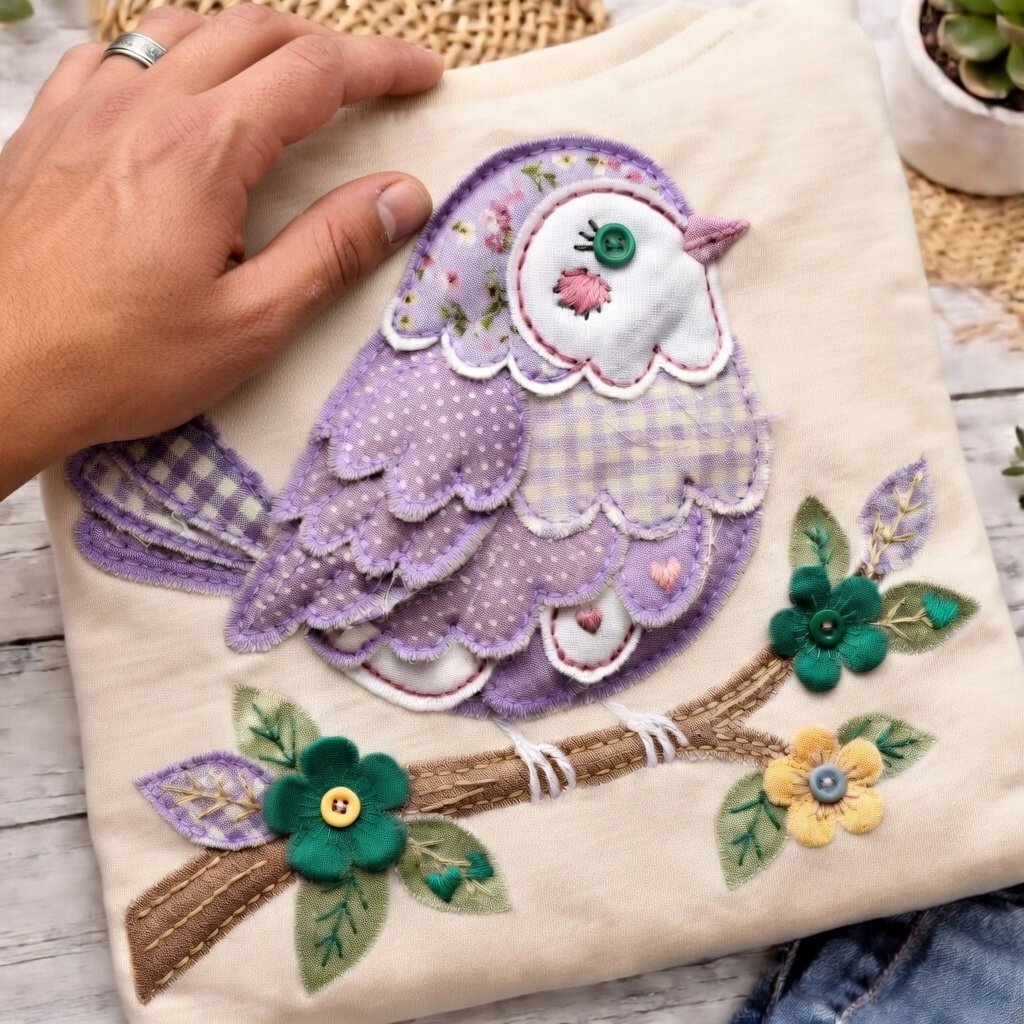
The DIY Bird and Branch – TUTORIAL is typically created using appliqué techniques, where fabric shapes are layered onto a background.
DISCOVER MORE FREE PATTERNS HERE!
The main design features a bird perched on a branch, often enhanced with additional elements like leaves or flowers.
The background fabric serves as the canvas, allowing the appliqué elements to stand out clearly.
One of the key features of the DIY Bird and Branch – TUTORIAL is the balance between simplicity and detail.
The bird and branch shapes can be simple or highly detailed, depending on your preference.
Understanding how to layer and position these elements is essential for creating a harmonious composition.
2. Best Materials for DIY Bird and Branch – TUTORIAL
Choosing the right materials is essential for achieving the best results with your DIY Bird and Branch – TUTORIAL.
Cotton fabric is the most commonly used material due to its durability and ease of handling.
Using contrasting fabrics for the bird and branch helps define the shapes clearly.
You may also incorporate patterned fabrics to add visual interest and texture.
High-quality thread ensures strong and clean stitching.
Basic tools include scissors, pins, a rotary cutter, and a sewing machine.
Optional materials such as fusible web can simplify the appliqué process, especially for beginners.
Selecting harmonious colors will enhance the overall beauty of the design.
3. Step-by-Step DIY Bird and Branch – TUTORIAL Process
Creating your own DIY Bird and Branch – TUTORIAL becomes simple when broken into clear steps.
Start by cutting a background fabric to your desired size.
Next, draw or trace the bird and branch shapes onto your chosen fabrics and cut them out carefully.
Position the shapes onto the background fabric and secure them with pins or fusible web.
Sew around the edges of each appliqué piece using your preferred method, ensuring smooth and even stitching.
Add additional details such as leaves or decorative stitching to enhance the design.
Finally, press the block and trim the edges for a clean and professional finish.
4. Creative Ideas for DIY Bird and Branch – TUTORIAL
The DIY Bird and Branch – TUTORIAL offers endless opportunities for creativity and personalization.
You can experiment with different bird species by adjusting colors and shapes.
Adding embroidery details such as feathers, veins on leaves, or outlines can bring the design to life.
This pattern is perfect for seasonal themes, such as spring or autumn-inspired quilts.
The DIY Bird and Branch – TUTORIAL can be used as a focal block in a larger quilt or as a standalone wall hanging.
You might also incorporate textured fabrics to add depth and dimension.
Creating a series of blocks with different birds can result in a cohesive and artistic quilt collection.
FAQ About DIY Bird and Branch – TUTORIAL
Is this pattern suitable for beginners?
Yes, especially if you use simple appliqué shapes and basic techniques.
Do I need a template for the bird design?
Templates are helpful, but you can also draw your own shapes.
What fabric works best?
Cotton fabric is highly recommended for both background and appliqué.
How do I make the design more detailed?
Use embroidery or layered fabrics to add texture and definition.
Can I adjust the size of the block?
Yes, simply scale the template and background fabric accordingly.
Can I sell items made from this tutorial?
Yes, handmade quilt pieces with unique designs are popular and can be sold.
Conclusion
The DIY Bird and Branch – TUTORIAL is a creative and meaningful quilting project that allows you to bring natural beauty into your handmade work. In this guide, you learned how to understand the structure, choose the best materials, follow a step-by-step process, and explore creative customization ideas.
This pattern is perfect for adding a peaceful and artistic touch to your home décor or creating thoughtful gifts. Its versatility and elegance make it a favorite among quilting enthusiasts.
Now it’s your turn to create your own DIY Bird and Branch – TUTORIAL. Experiment with colors, textures, and designs to make your project truly unique. Don’t forget to leave your honest opinion and share your suggestions—your feedback helps inspire even more creative ideas!