DIY Denim Quilted Cat Placemat – TUTORIAL is a creative and eco-friendly quilting project that allows you to transform old denim into a charming cat-shaped placemat. By following the DIY Denim Quilted Cat Placemat – TUTORIAL, you can create a unique and functional piece that adds personality to your dining table while promoting sustainable crafting.
One of the most appealing aspects of the DIY Denim Quilted Cat Placemat – TUTORIAL is its combination of practicality and creativity. The durability of denim makes it perfect for everyday use, while the playful cat design brings a cozy and fun touch to your home décor. This project is also a great way to reuse fabric scraps and reduce waste.
In this complete DIY Denim Quilted Cat Placemat – TUTORIAL, you will learn how to select the right materials, prepare and cut denim pieces, assemble the quilted placemat, and finish it with professional details. This guide is suitable for beginners and experienced quilters alike.
1. Materials Needed for DIY Denim Quilted Cat Placemat
The first step in the DIY Denim Quilted Cat Placemat – TUTORIAL is gathering all the materials needed for a smooth quilting process.
DISCOVER MORE FREE PATTERNS HERE!
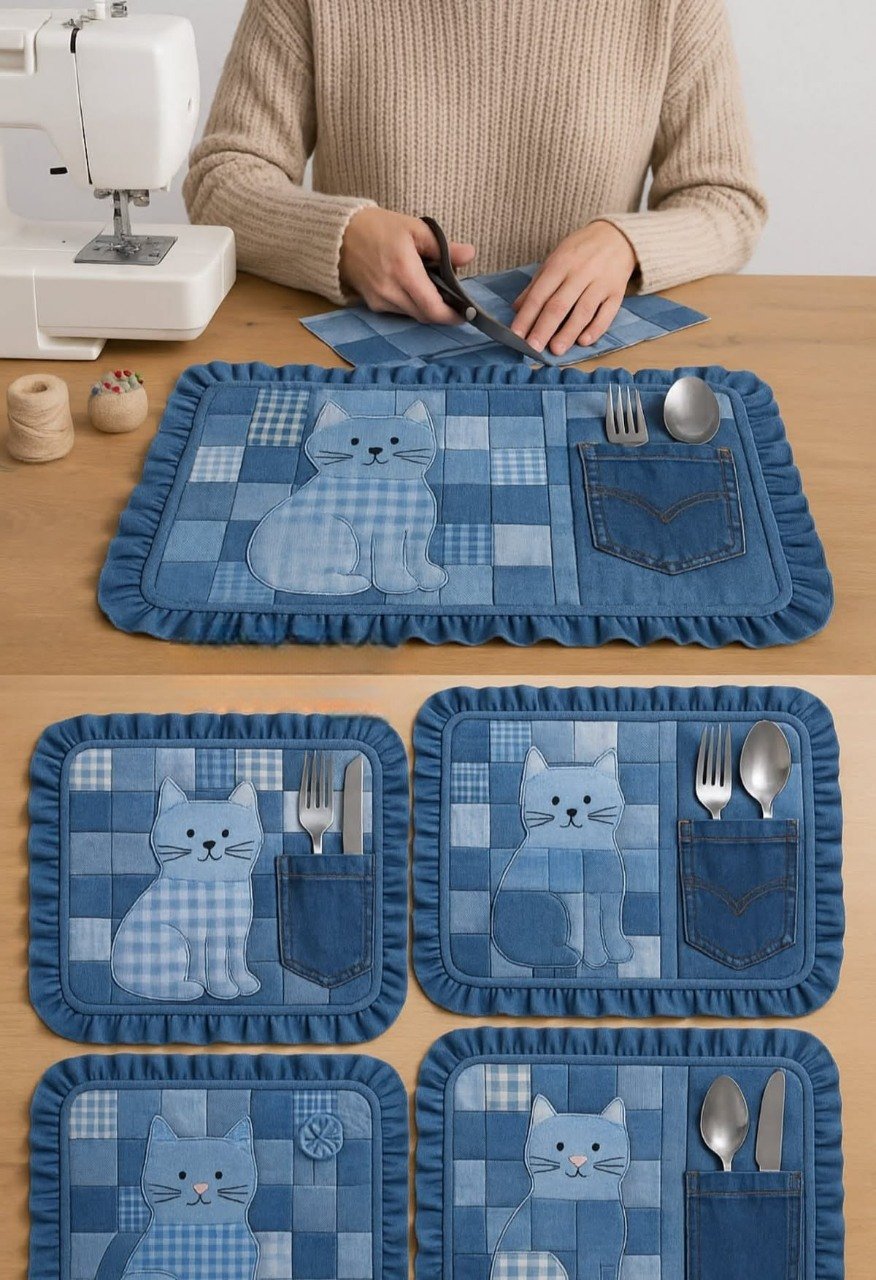
Old denim jeans are the main material, offering strength and texture.
You can use different shades of denim for a more dynamic look.
Cotton fabric can be used for backing or decorative details.
Basic tools such as scissors, pins, a sewing machine, and a measuring tape are essential.
Batting is needed to provide thickness and insulation.
An iron is important for pressing seams and ensuring accuracy.
2. Cutting and Preparing the Denim Pieces
Preparation is a key part of the DIY Denim Quilted Cat Placemat – TUTORIAL, ensuring all pieces are ready for assembly.
Start by selecting denim areas that are not overly worn.
Trace the cat placemat shape onto your fabric.
In the DIY Denim Quilted Cat Placemat – TUTORIAL, precise cutting ensures a clean and balanced design.
Cut the front, batting, and backing pieces accordingly.
If using patchwork, sew smaller denim pieces together first.
Press all fabric pieces to make the sewing process easier.
3. Assembling and Quilting the Placemat
The next stage in the DIY Denim Quilted Cat Placemat – TUTORIAL is assembling the placemat layers.
Layer the denim top, batting, and backing fabric together.
Secure the layers with pins or basting.
In the DIY Denim Quilted Cat Placemat – TUTORIAL, quilting stitches add both texture and durability.
Sew around the edges and along the design to hold the layers in place.
You can add decorative stitching to enhance the cat shape.
This step brings structure and style to your placemat.
4. Finishing and Customizing Your Cat Placemat
The final stage of the DIY Denim Quilted Cat Placemat – TUTORIAL focuses on finishing touches and personalization.
Trim excess fabric and shape the edges neatly.
Add binding around the placemat for a clean and professional finish.
You can embroider facial features or add appliqué details.
In the DIY Denim Quilted Cat Placemat – TUTORIAL, customization allows you to create a unique piece.
Adjust the size or design according to your preference.
Once completed, your placemat is ready to use or display.
FAQ – DIY Denim Quilted Cat Placemat – TUTORIAL
Is this project suitable for beginners?
Yes, the DIY Denim Quilted Cat Placemat – TUTORIAL is beginner-friendly.
What type of denim works best?
Medium-weight denim is ideal for durability and ease of sewing.
Can I use other fabrics?
Yes, but denim provides a unique texture and strength.
How long does it take to complete?
It can usually be finished in a few hours.
Do I need batting?
Yes, batting adds thickness and insulation.
Can I customize the design?
Absolutely, you can modify the shape and add decorative elements.
Conclusion
The DIY Denim Quilted Cat Placemat – TUTORIAL is a fun and sustainable quilting project that combines creativity with functionality. It allows you to turn old materials into a charming and practical item for your home.
In this tutorial, you learned how to select materials, prepare denim pieces, assemble and quilt the placemat, and finish it with personalized details. Each step contributes to a durable and visually appealing final result.
Projects like the DIY Denim Quilted Cat Placemat – TUTORIAL show how quilting can transform simple materials into creative and meaningful handmade pieces.
If you enjoyed this tutorial, feel free to leave your honest opinion and share your suggestions. Your feedback helps inspire more creative quilting ideas and projects.