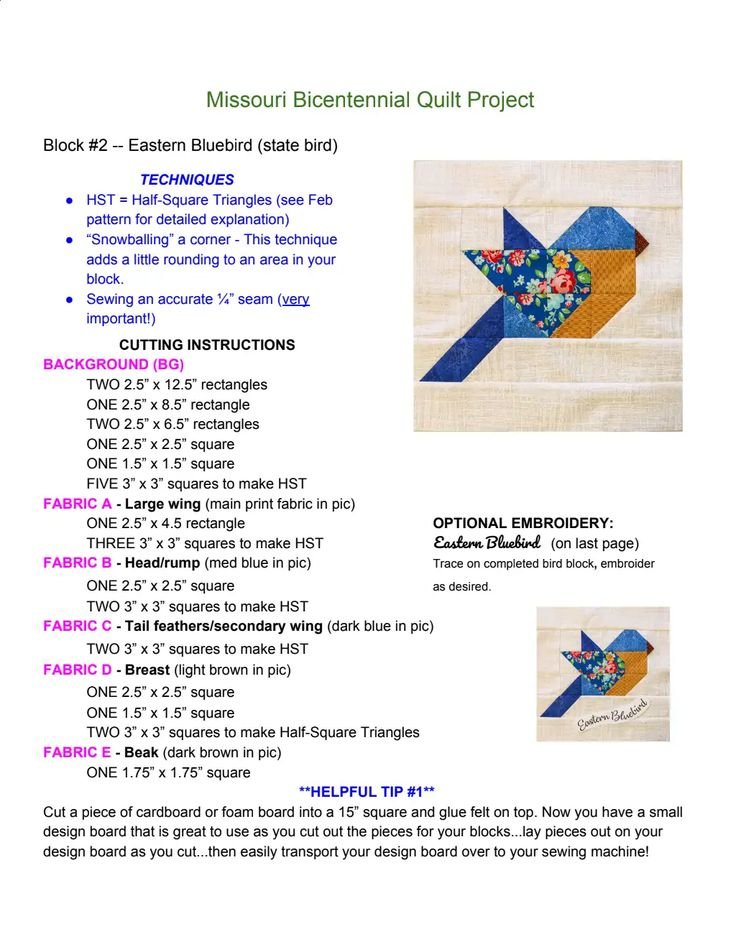
The Missouri Bicentennial Quilt pattern is a special design created to commemorate the 200th anniversary of Missouri’s statehood. This quilt pattern is a beautiful blend of history and creativity, featuring elements that represent the state’s culture, heritage, and natural beauty. Whether you’re a quilter with a love for history or simply looking to create a stunning and meaningful quilt, the Missouri Bicentennial Quilt is a perfect choice.
The pattern for the Missouri Bicentennial Quilt combines traditional quilting techniques with a modern twist, making it suitable for quilters of all skill levels. In this tutorial, we’ll guide you step-by-step through the process of making your own Missouri Bicentennial Quilt, from fabric selection and cutting to piecing and assembling the quilt. By the end of this guide, you’ll have a beautiful, finished quilt that pays tribute to the rich history of Missouri.
This quilt pattern features a mix of traditional blocks and symbolic designs that reflect Missouri’s bicentennial celebration. With its stars, state symbols, and other decorative elements, the Missouri Bicentennial Quilt is not just a project; it’s a piece of history you can cherish for years to come.

1. Materials and Tools You Will Need
Before beginning your Missouri Bicentennial Quilt, make sure you have all the necessary materials and tools. Here’s a list of what you’ll need to complete the quilt:
SEE OTHER FACE PATTERNS HERE!
- Fabric: Choose a variety of fabrics to represent the colors and themes of the Missouri Bicentennial. You will need background fabrics, as well as fabrics for the main design elements, such as stars, state symbols, and borders. Consider using a patriotic color palette with red, white, blue, and gold.
- Rotary Cutter and Mat: A rotary cutter will help you cut your fabric pieces accurately, while the cutting mat will protect your surface and ensure clean cuts.
- Ruler: A quilting ruler is essential for precise measurements and cuts.
- Scissors: For trimming fabric pieces and threads.
- Needle and Thread: Use a durable thread that complements your fabric choices. A 40wt or 50wt thread is ideal for quilting.
- Iron and Ironing Board: Press your seams as you go to ensure your quilt pieces are neat and flat.
- Pins or Wonder Clips: To hold fabric pieces in place as you sew.
- Quarter-Inch Seam Foot: This foot will help you maintain a consistent seam allowance, which is crucial for precise piecing.
Once you’ve gathered your materials, you’ll be ready to begin piecing your Missouri Bicentennial Quilt.
2. Cutting Your Fabric Pieces
The first step in making the Missouri Bicentennial Quilt is to cut your fabric pieces. Accurate cutting is critical to ensuring your quilt pieces fit together perfectly and that your quilt top looks polished.
Start by cutting the main quilt block pieces according to the pattern. These will include the various sections of the design, such as stars, borders, and any other decorative elements. Use your quilting ruler and rotary cutter to measure and cut these pieces with precision. You may need to cut triangles, squares, and rectangles, depending on the design.
Next, cut the background fabric pieces. These will form the space between the stars and symbols, and will help frame the design. Be sure to follow the pattern carefully, ensuring each piece is the right size.
Labeling your pieces as you cut them will help keep everything organized. This will save time later in the process, especially when it’s time to start piecing the quilt together.
3. Piecing the Quilt Blocks
Once all your fabric pieces are cut, it’s time to start piecing the Missouri Bicentennial Quilt blocks together. Begin with the center block, which usually features a prominent design element such as a star, state symbol, or historical image. Use the quarter-inch seam allowance to ensure your pieces align correctly.
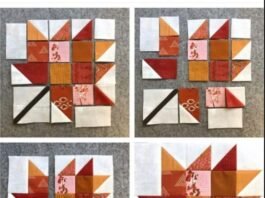
Start by sewing smaller sections together to form larger sections. For example, when creating a star block, sew the triangle pieces together to form the star points, then sew the points together to create the full star. Press the seams flat after each step to maintain accuracy and reduce bulk.
After you’ve pieced together the star or other design element, sew the surrounding blocks or fabric pieces to complete the full quilt block. Be sure to match seams carefully as you join the sections together to ensure that the design aligns properly.
As you continue piecing each block, take your time and check your work. Accurate piecing is key to achieving a quilt top that is both beautiful and well-constructed.
4. Assembling the Quilt Top
After you’ve pieced together all the individual quilt blocks, it’s time to assemble the quilt top. Lay out your quilt blocks on a flat surface according to the arrangement in the pattern. This is the perfect time to make sure you’re happy with the design and the placement of the blocks. You can rearrange the blocks if necessary until everything looks balanced.
Once you’re satisfied with the layout, begin sewing the blocks together in rows. Start with two blocks and sew them together, then add another block, continuing until you have a full row. Press the seams flat as you go to keep the quilt top neat.
After the rows are complete, sew them together to form the full quilt top. When joining the rows, make sure the seams match up properly for a clean finish. Press the seams again to ensure the quilt top lays flat.
Once the quilt top is complete, give it one final press and check for any areas that may need additional trimming. Your Missouri Bicentennial Quilt top should now be ready for the next steps: adding batting, backing, and quilting.
FAQ
1. What is the Missouri Bicentennial Quilt, and why was it created?
The Missouri Bicentennial Quilt was designed to celebrate the 200th anniversary of Missouri’s statehood. It features design elements that represent Missouri’s history, culture, and natural beauty, including stars, state symbols, and patriotic colors.
🌟Join our exclusive Quilt broadcast list on Messenger! Receive the best patterns, tips, and updates directly in your inbox. Our team is ready to send you delightful content that will inspire your projects. Don’t miss this opportunity to stay updated and create amazing pieces. Join now and be part of this passionate quilt community!✨📩
2. Can I use different fabrics for the quilt?
Yes, you can use different fabrics to suit your personal style. While the pattern is designed with a patriotic color palette, you can customize it by using fabrics that reflect your own preferences or the recipient’s taste.
3. How do I make sure my quilt blocks are pieced accurately?
To ensure accuracy, always use a quarter-inch seam allowance and press your seams as you go. Double-check your measurements before cutting, and make sure to label your pieces to keep everything organized.
4. Can I make the Missouri Bicentennial Quilt a different size?
Yes, you can adjust the size of the quilt by increasing or decreasing the number of blocks you use. You can also modify the dimensions of the borders if you wish to create a larger or smaller quilt.
5. How do I quilt the Missouri Bicentennial Quilt once the top is complete?
Once your quilt top is finished, you can add batting and backing fabric to create the quilt sandwich. Then, quilt the layers together using your preferred quilting technique, such as straight-line quilting, free-motion quilting, or hand quilting.
6. Can I give the Missouri Bicentennial Quilt as a gift?
Absolutely! The Missouri Bicentennial Quilt makes a unique and meaningful gift, especially for someone with a connection to Missouri. Its historical significance and beautiful design make it a thoughtful and personal present.
In this Missouri Bicentennial Quilt tutorial, you’ve learned how to create a beautiful quilt that celebrates Missouri’s rich history and heritage. From selecting fabrics to piecing the blocks and assembling the quilt top, this step-by-step guide has shown you how to make a quilt that is both meaningful and visually stunning.
We hope you enjoyed this tutorial! If you have any questions or suggestions for future quilting projects, feel free to leave a comment below. Your feedback is always welcome, and we’d love to hear how you customized your Missouri Bicentennial Quilt. Happy quilting!


