The Pie Carrier – Tutorial is a practical and charming quilting project that combines functionality with handmade elegance. Whether you’re heading to a family gathering, holiday dinner, church event, or picnic, a quilted pie carrier makes transporting baked goods safe, stylish, and personal.
Unlike traditional quilts, this project is smaller, faster to complete, and incredibly useful. It’s perfect for confident beginners who want to practice precision sewing, quilting layers, and handle construction without committing to a full-size quilt. It also makes a thoughtful handmade gift for bakers, friends, and hosts.
In this complete guide, you’ll learn how to construct a quilted pie carrier step by step, choose the best fabrics and batting, add sturdy handles, and finish it professionally.
1. Understanding the Structure of a Quilted Pie Carrier
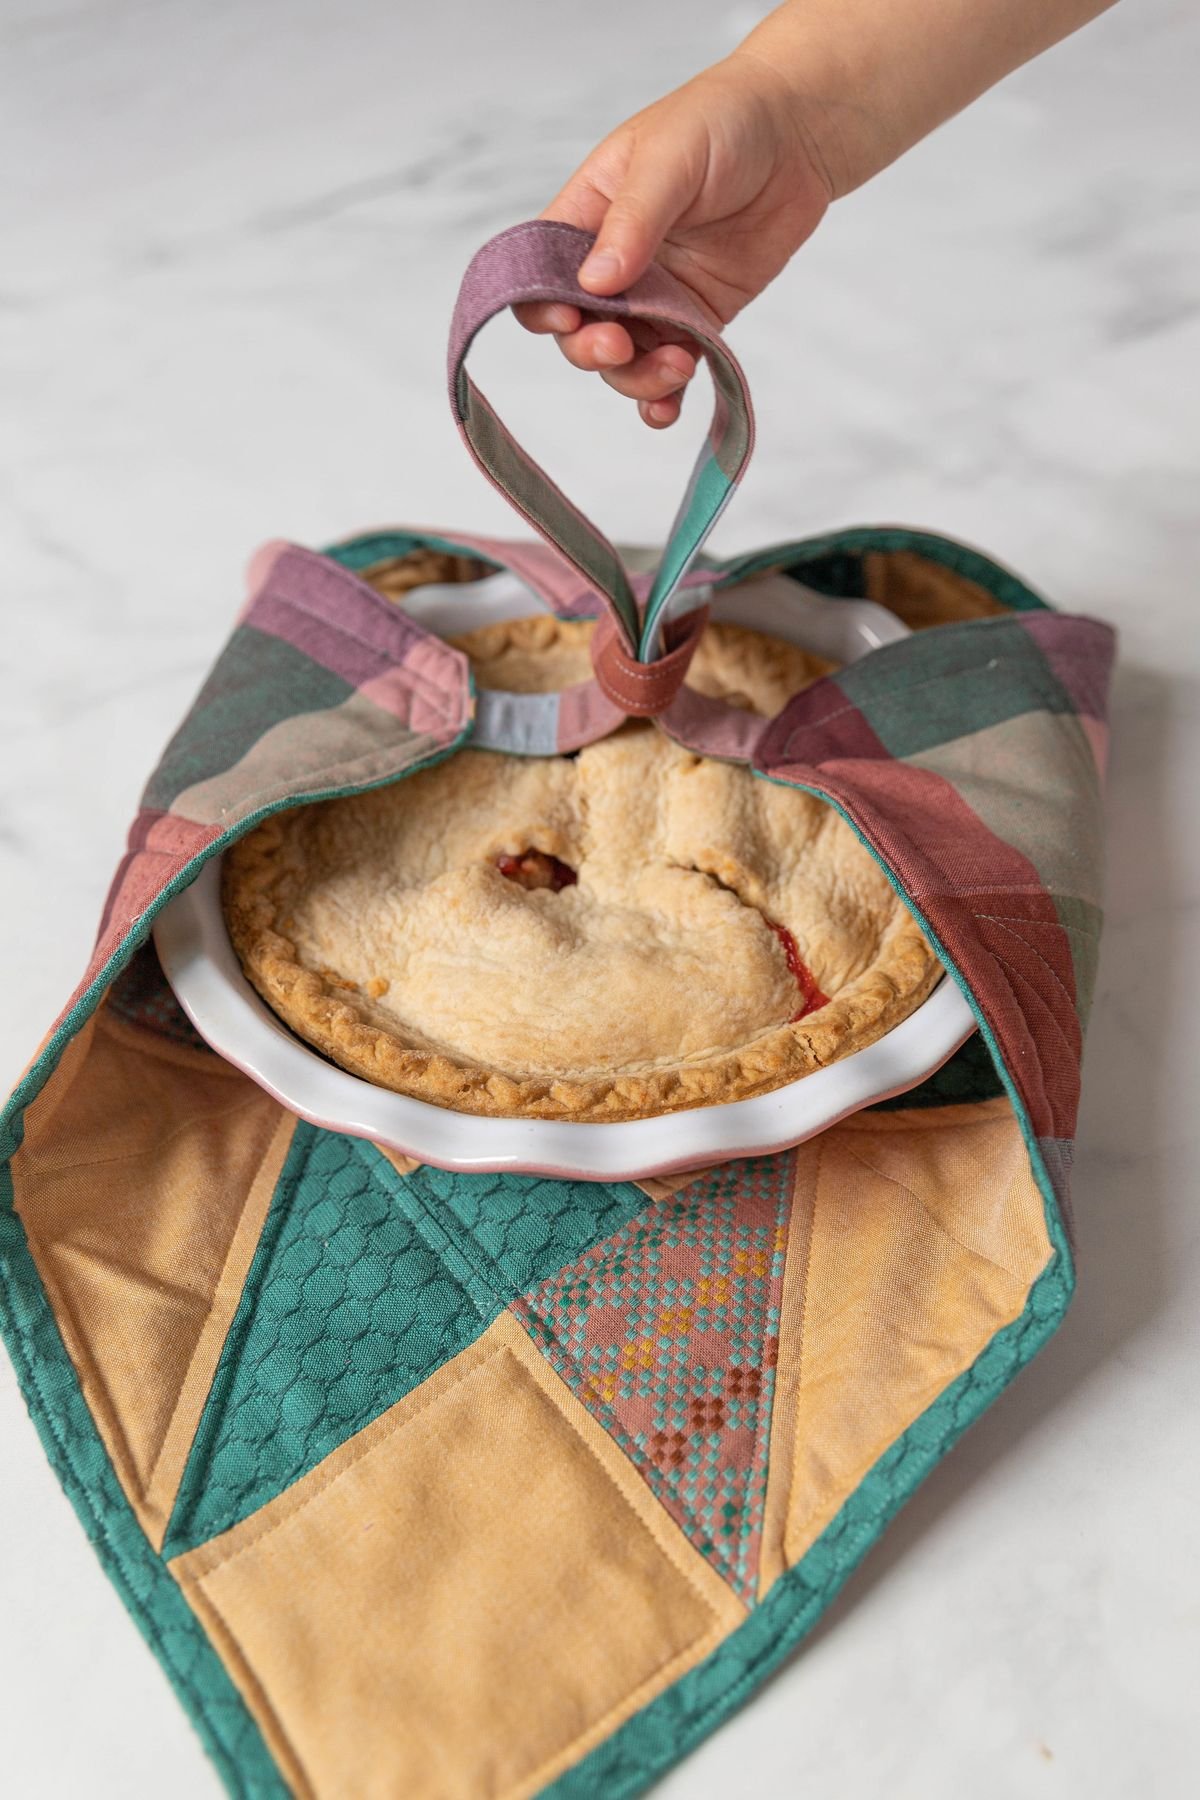
The Pie Carrier – Tutorial typically features a quilted square or circular base with attached fabric handles that wrap around and secure at the top. The design cradles a standard 9-inch pie dish, keeping it stable during transport.
DISCOVER MORE FREE PATTERNS HERE!
Most pie carriers include:
A quilted base (usually 16” to 20” square)
Batting for insulation and padding
A backing fabric
Two long fabric handles
Optional decorative top stitching
The base acts as a padded mat that protects the pie dish. The handles cross over the top of the dish and fasten securely, either by tying in a knot or attaching with Velcro or buttons.
One of the biggest advantages of this project is its versatility. You can customize size, fabric style, and handle length depending on your needs. Some quilters even add pockets for utensils or recipe cards.
This project is ideal for using leftover fabric from previous quilting projects. Coordinated prints create a polished look, while scrappy designs add charm and personality.
2. Choosing the Right Materials for Durability
Because this project needs to support weight and heat, selecting the right materials is important.
Fabric Choice
Use 100% cotton quilting fabric for both the top and backing. Cotton is durable, easy to sew, and heat-friendly. Avoid delicate fabrics that may weaken under weight.
Batting
Choose a medium-loft cotton batting. Cotton batting provides light insulation and stability without making the carrier too bulky.
Optional Insulated Layer
If you want added heat retention, you can include a thermal batting layer designed for kitchen projects.
Thread
Use high-quality cotton or polyester thread for durability, especially for the handles.
Handles
Handles can be made from folded fabric strips, reinforced with interfacing for extra strength. The handles must be strong enough to support the weight of a filled pie dish.
Color and design matter too. Seasonal prints are popular:
Fall-themed fabrics for Thanksgiving
Red and green for Christmas gatherings
Floral prints for spring and summer picnics
Neutral farmhouse styles for everyday use
Selecting sturdy materials ensures your Pie Carrier – Tutorial project lasts for years.
3. Step-by-Step Construction Guide
Creating your pie carrier becomes simple when broken into organized steps.
Step 1: Cut the Base
Cut one square of top fabric, one square of backing fabric, and one square of batting. A common size is 18” x 18”, which fits most standard pie dishes.
Step 2: Prepare the Quilt Sandwich
Layer backing (right side down), batting, and top fabric (right side up). Smooth out wrinkles carefully.
Step 3: Quilt the Layers
Quilt straight lines, diagonal grids, or simple free-motion designs across the entire square. Straight-line quilting works especially well for beginners.
Step 4: Trim and Bind
Trim the edges evenly. Add binding around the entire square just as you would with a quilt. This gives the carrier a clean, finished look.
Step 5: Create the Handles
Cut two long strips of fabric (approximately 4” wide and 40” to 45” long). Fold each strip lengthwise, press, and stitch to create strong straps. Reinforce with interfacing if needed.
Step 6: Attach the Handles
Center one handle across the middle of the square from one side to the opposite side. Stitch securely at both ends with reinforced stitching. Repeat with the second handle, positioning it perpendicular to the first.
The handles should form a cross shape underneath the base and extend upward when lifting the pie.
Step 7: Final Reinforcement
Add extra stitching where handles attach to ensure strength. This is critical for safety during transport.
Once complete, place a pie dish in the center, lift the handles together, and tie or secure them above the dish.
Following these steps carefully ensures a sturdy and professional finish.
4. Creative Variations and Professional Tips
Once you master the basic Pie Carrier – Tutorial, there are many ways to customize it.
Add a Decorative Block
Piece a quilt block into the center of the base for added charm.
Appliqué Design
Add seasonal appliqué such as pumpkins, snowflakes, or floral motifs.
Add a Pocket
Sew a small pocket onto one corner for utensils or recipe cards.
Insulated Upgrade
Include thermal batting for better heat retention.
Reversible Design
Use coordinating fabrics so the carrier looks beautiful on both sides.
Professional Tips:
Use a walking foot when quilting to prevent shifting
Reinforce handle stitching with a box-and-X pattern
Press all seams carefully for a polished finish
Test the handle strength before first use
Because this project is small, it’s also perfect for craft fairs and handmade gift sales. It’s practical, affordable to make, and highly appealing to customers.
Frequently Asked Questions (FAQ)
What size pie does this carrier fit?
Most standard 18” square bases fit a 9-inch pie dish comfortably.
Can I wash the pie carrier?
Yes, if made with cotton fabrics and batting. Wash on gentle cycle and air dry for best results.
Do I need special batting?
Regular cotton batting works well. Thermal batting is optional for added insulation.
Can beginners make this project?
Yes. It uses basic quilting techniques and straight seams, making it beginner-friendly.
How do I make the handles stronger?
Use interfacing and reinforce stitching at attachment points for maximum durability.
Conclusion
The Pie Carrier – Tutorial is a practical and rewarding quilting project that blends beauty with everyday function. It’s quick to sew, easy to customize, and perfect for gifting or personal use.
Whether you choose seasonal prints, modern solids, or scrappy leftovers, your finished carrier will showcase your creativity while serving a useful purpose.
Have you ever made a quilted kitchen accessory? Share your ideas, favorite fabric themes, or creative additions in the comments. Your inspiration could help another quilter create something both beautiful and functional.

