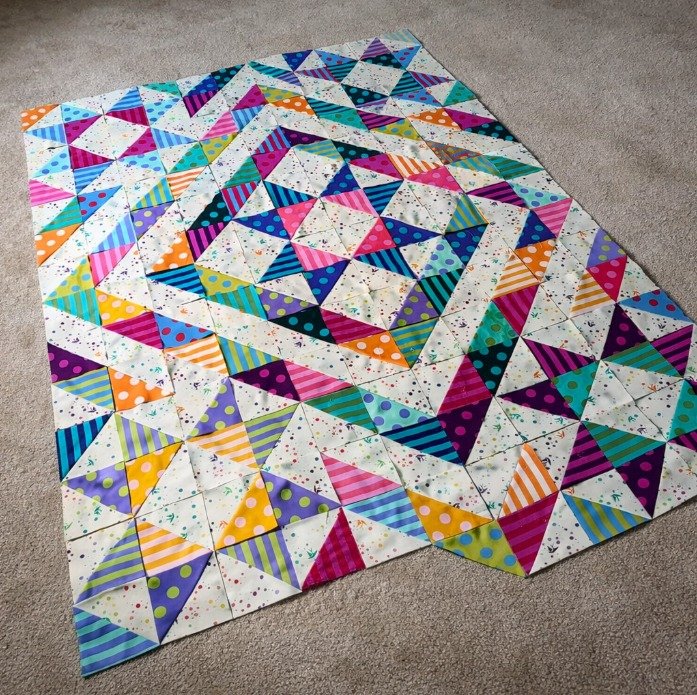
The Stars Over Scott – TUTORIAL is a beautiful quilting project that celebrates classic patchwork design while offering quilters an engaging and rewarding creative experience. This quilt pattern highlights elegant star blocks arranged in a balanced composition that feels both traditional and timeless. Quilters of all skill levels can appreciate how the Stars Over Scott – TUTORIAL transforms simple geometric shapes into a visually striking quilt.
Quilting has always been about storytelling through fabric, and the Stars Over Scott – TUTORIAL reflects this tradition perfectly. The star motif has long been one of the most beloved designs in quilting history, symbolizing guidance, hope, and craftsmanship. By combining carefully pieced star blocks with thoughtful fabric choices, this quilt becomes more than a blanket—it becomes a piece of art.
In this guide, we will explore the structure and techniques behind the Stars Over Scott – TUTORIAL, including materials, block construction, layout ideas, and finishing steps. Whether you are a beginner learning star blocks or an experienced quilter searching for a meaningful project, this tutorial will help you create a quilt filled with character and beauty.
1. The Inspiration and Design Behind the Stars Over Scott Quilt
The Stars Over Scott – TUTORIAL draws inspiration from classic American quilting traditions, where star patterns have played an important role for generations. Star blocks are among the most recognizable quilt designs, and they remain popular because of their versatility and timeless appeal.
DISCOVER MORE FREE PATTERNS HERE!
In many historical quilts, star patterns symbolized navigation and direction. Quilters used stars not only as decorative motifs but also as meaningful visual elements that represented guidance and hope. The Stars Over Scott – TUTORIAL continues this tradition by placing star blocks at the heart of the quilt design.
One of the reasons the Stars Over Scott quilt pattern stands out is its balanced layout. The arrangement of star blocks across the quilt surface creates a sense of movement and harmony that draws the viewer’s attention across the entire piece.
Another key feature of this design is the opportunity for color creativity. Quilters can experiment with bold contrasts, soft gradients, or scrappy fabric combinations to personalize the final quilt.
The star blocks themselves are typically built using traditional piecing techniques. These techniques help maintain clean lines and precise points, which are essential for achieving a polished quilt appearance.
Understanding the inspiration behind the Stars Over Scott – TUTORIAL allows quilters to appreciate not only the visual beauty of the design but also its connection to quilting history and tradition.
2. Materials and Fabric Choices for the Stars Over Scott Quilt
Preparing the right materials is an important step when starting the Stars Over Scott – TUTORIAL. Having all supplies ready before beginning will make the quilting process smoother and more enjoyable.
The most important material is fabric. Quilters often choose high-quality cotton fabric because it is durable, easy to sew, and widely available in a variety of colors and prints.
When selecting fabrics for the Stars Over Scott quilt, contrast is key. Light and dark fabrics help define the star shapes clearly, allowing the star blocks to stand out against the background.
Many quilters enjoy using coordinated fabric collections for this project. These collections ensure that colors complement each other while still providing visual variety.
In addition to fabric, basic quilting tools are necessary. A rotary cutter, quilting ruler, and self-healing cutting mat will help achieve accurate fabric cuts.
You will also need sewing thread, pins or clips, and a reliable sewing machine for piecing the quilt blocks together.
Finally, batting and backing fabric will be required to complete the quilt. These layers give the finished Stars Over Scott quilt warmth, structure, and durability.
3. Constructing the Star Blocks Step by Step
The centerpiece of the Stars Over Scott – TUTORIAL is the star block itself. These blocks are created by carefully combining smaller fabric units into a larger geometric design.
The process typically begins by cutting fabric pieces into squares, rectangles, and triangles. Accurate cutting is essential because it ensures that the star points align correctly during assembly.
Many star quilt patterns use half-square triangles or flying geese units. These elements form the sharp angles that give star blocks their recognizable shape.
Once the smaller units are prepared, they are sewn together in rows to form the complete star block. Quilters must pay close attention to seam allowances to maintain accurate block measurements.
Pressing seams carefully is another important step in the Stars Over Scott quilt block construction. Proper pressing helps keep the blocks flat and ensures crisp points where fabric pieces meet.
After several star blocks are completed, they can be arranged to preview the final quilt layout. This step allows quilters to experiment with color placement before assembling the full quilt top.
By following these steps, the Stars Over Scott – TUTORIAL gradually transforms individual fabric pieces into a striking collection of star blocks.
4. Assembling the Quilt Top and Finishing the Project
Once the star blocks are complete, the next step in the Stars Over Scott – TUTORIAL is assembling the quilt top. This stage brings together all the blocks into a unified design.
Begin by arranging the blocks on a flat surface or design wall. This allows you to visualize the layout and adjust the placement of colors and patterns.
Sashing strips may be added between blocks if desired. These strips create visual separation and help highlight each star block within the overall quilt design.
After finalizing the layout, the blocks are sewn together row by row. Taking time to match seams carefully will help maintain alignment across the quilt top.
Once the quilt top is assembled, it is layered with batting and backing fabric to create the quilt sandwich. This layered structure prepares the quilt for the quilting stage.
Quilting stitches can be added using straight lines, echo patterns, or free-motion designs. These stitches secure the layers while adding decorative texture to the finished quilt.
The final step in the Stars Over Scott – TUTORIAL is attaching the binding around the quilt edges. Binding protects the quilt and provides a polished, professional finish.
FAQ – Stars Over Scott Quilt Tutorial
Is the Stars Over Scott quilt suitable for beginners?
Yes, beginners with basic quilting experience can try this project. The star blocks use traditional piecing techniques that are commonly taught in quilting.
What type of fabric is best for the Stars Over Scott quilt?
Cotton quilting fabric is the most recommended choice because it is durable, easy to handle, and available in many patterns and colors.
How large can the Stars Over Scott quilt be?
The size depends on the number of star blocks used. Quilters can create anything from a small lap quilt to a large bed quilt by adjusting the layout.
Do I need special tools to make the star blocks?
Standard quilting tools such as a rotary cutter, ruler, and sewing machine are sufficient for completing the Stars Over Scott – TUTORIAL.
Can I make a scrappy version of this quilt?
Yes, many quilters enjoy using fabric scraps to create colorful star blocks, which adds personality and variety to the design.
Is the Stars Over Scott quilt a good gift project?
Absolutely. Handmade quilts featuring star patterns are meaningful gifts that can be treasured for many years.
Conclusion
The Stars Over Scott – TUTORIAL is a timeless quilting project that blends traditional star block design with creative fabric choices. By carefully piecing together geometric shapes, quilters can create a stunning quilt that celebrates both craftsmanship and creativity.
Throughout this article, we explored the inspiration behind the star pattern, the materials needed for the quilt, the step-by-step process for constructing star blocks, and the final steps required to assemble and finish the quilt.
Creating the Stars Over Scott quilt is not only a rewarding sewing experience but also an opportunity to produce a beautiful handmade piece that can be displayed, gifted, or cherished for years.
Now we would love to hear from you. Did you enjoy learning about the Stars Over Scott – TUTORIAL? Do you have suggestions, ideas, or creative variations for this quilt pattern?
Leave your honest opinion and share your suggestions. Your feedback helps inspire new quilting projects and strengthens the creative quilting community.

