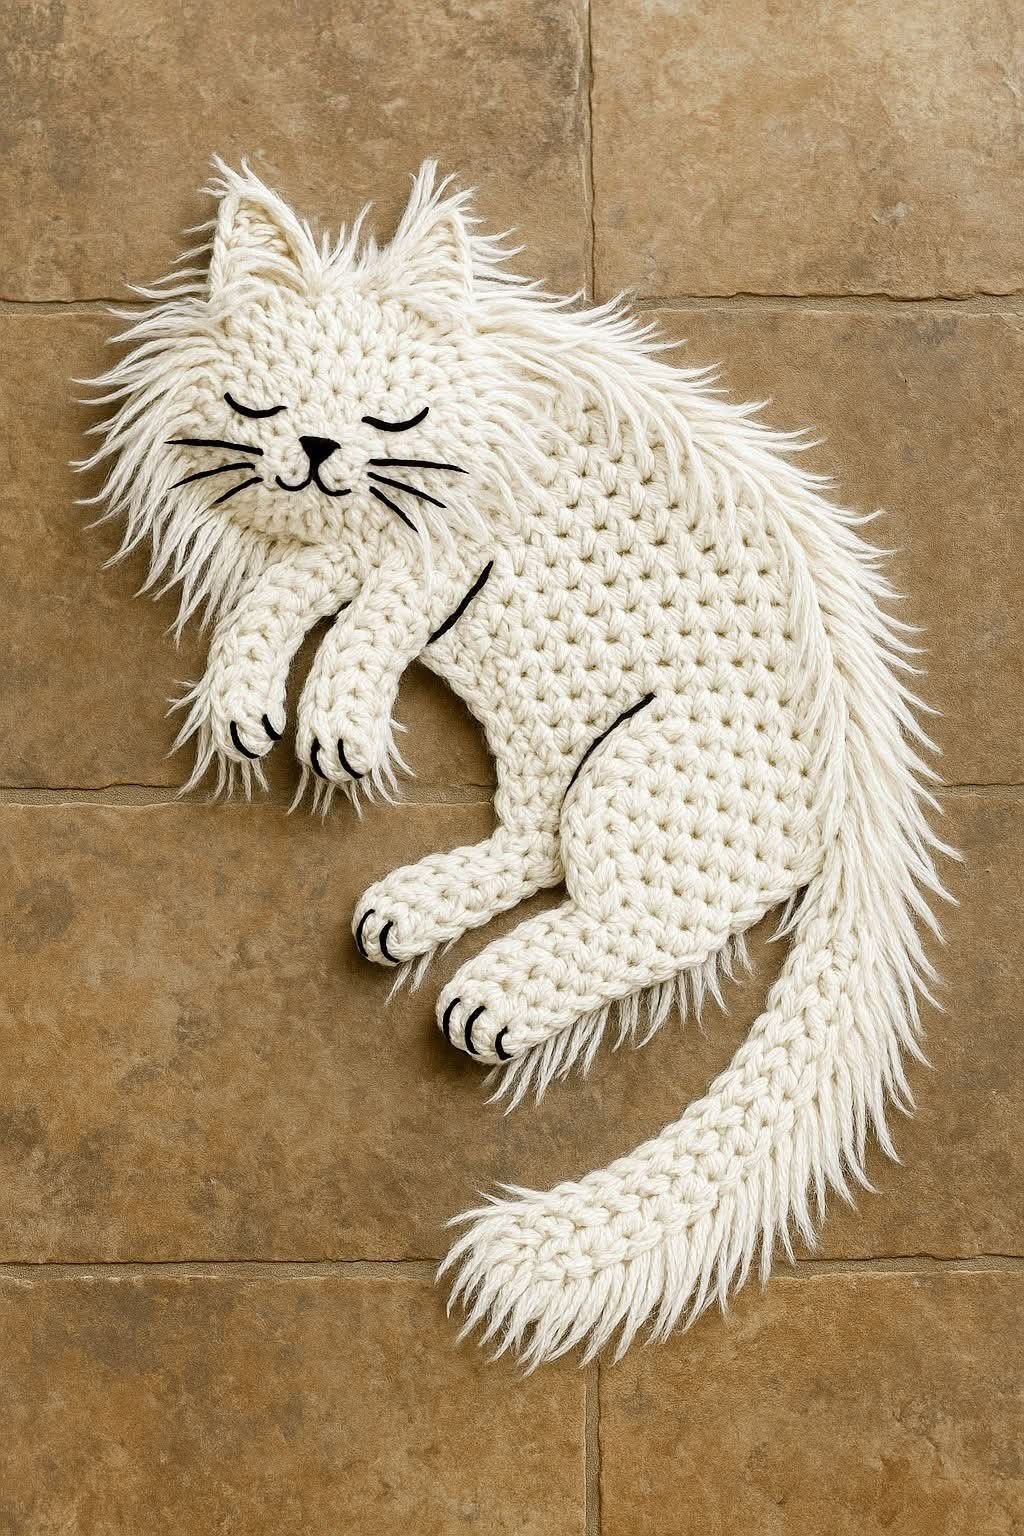
The Cute Cat Rug – Tutorial is a delightful crochet project that combines functionality with irresistible charm. Perfect for nurseries, kids’ rooms, craft spaces, or cozy reading corners, this rug brings warmth and personality to any space while showcasing your crochet skills.
If you enjoy creating decorative yet practical pieces, the Cute Cat Rug – Tutorial offers a rewarding experience. With its playful cat shape, textured stitches, and customizable details, this project allows you to turn simple yarn into an eye-catching home accessory.
In this complete guide, you’ll learn how to choose the right materials, shape the base, add facial features, and finish your rug for durability and long-lasting use.
Choosing Materials for a Durable Rug
Because this is a floor piece, yarn selection is especially important. For the Cute Cat Rug – Tutorial, choose a sturdy yarn such as cotton, cotton blend, or t-shirt yarn. These fibers are durable, easy to clean, and hold their shape well.
DISCOVER MORE FREE PATTERNS HERE!
A larger crochet hook is typically used depending on yarn thickness. Bulky yarns require larger hooks, which help the rug work up quickly and create a soft, cushioned texture.
You will also need:
-
Scissors
-
Yarn needle
-
Stitch markers
-
Non-slip rug backing (optional but recommended)
If the rug will be placed on smooth flooring, adding a non-slip backing or rug pad greatly improves safety.
Creating the Cat-Shaped Base
The base of the Cute Cat Rug – Tutorial usually begins with an oval or circular foundation that forms the cat’s head or body.
Start with a chain foundation and work in rounds, increasing evenly to maintain a flat shape. Keep your tension consistent to prevent curling edges. If the rug begins to ruffle, reduce increases slightly. If it curls inward, add a few more increases evenly spaced.
Continue building the base until you reach your desired size. The beauty of this pattern is its flexibility — you can make a small accent rug or a large statement piece.
For added texture, consider using simple stitch variations such as half double crochet or double crochet. These stitches create a thicker fabric ideal for rugs.
Adding the Ears and Tail
What makes the Cute Cat Rug – Tutorial so charming are the playful details.
Ears are typically crocheted separately in triangular shapes and sewn securely onto the top of the base. Make sure they are symmetrical for a balanced look.
The tail can be crocheted as a long, slightly curved piece and attached to one side of the rug. You may lightly stuff the tail for dimension or leave it flat for easier washing.
When attaching these elements, use strong stitching and reinforce the seams. Since rugs experience more wear than decorative pieces, durability is key.
Creating the Cat’s Face
The face brings personality to your Cute Cat Rug – Tutorial.
For safety and longevity, embroidered features are recommended. Use contrasting yarn or embroidery thread to stitch:
-
Closed or open eyes
-
A small triangle nose
-
Whiskers
-
A gentle smile
You can customize the expression — sleepy eyes for a calm look, wide eyes for a playful vibe.
Keep stitches neat and secure. Double-knot yarn ends and weave them tightly into the fabric to prevent loosening over time.
Customization Ideas
One of the best parts of the Cute Cat Rug – Tutorial is the opportunity to personalize it.
Choose classic cat colors like gray, black, cream, or orange tabby tones. For a whimsical nursery style, try pastel pink, mint, or baby blue.
You can also:
-
Add stripes for a tabby effect
-
Create a heart-shaped nose
-
Add a bow near one ear
-
Use fluffy yarn for a soft texture effect
If making multiple rugs, try different cat expressions to create a themed set.
Finishing and Care Tips
Once your rug is complete, block it lightly to ensure it lies flat. Steam blocking works well for cotton yarn, but avoid over-saturating.
Attach non-slip backing if needed. This step is especially important in households with children.
For cleaning, follow the yarn label instructions. Most cotton rugs can be gently machine washed and air dried.
Regularly check seams and embroidered details to maintain safety and durability.
Frequently Asked Questions
Is the Cute Cat Rug – Tutorial beginner-friendly
Confident beginners who understand basic increases and working in rounds can complete this project successfully.
How long does it take to make
Depending on size and yarn weight, it may take one to three days to finish.
Can I adjust the size
Yes, simply continue increasing rounds until you reach your desired dimensions.
What yarn is best
Durable cotton or t-shirt yarn is ideal for rugs.
Can I sell rugs made from this pattern
Always check the designer’s original terms if using a purchased pattern.
Conclusion
The Cute Cat Rug – Tutorial is a fun and creative way to combine crochet with home décor. With sturdy yarn, thoughtful shaping, and adorable details, you can craft a cozy rug that adds warmth and personality to any room.
Whether you’re decorating a child’s space, creating a handmade gift, or adding charm to your own home, this cat rug is sure to bring smiles.
Have you ever made a crochet rug before? Share your favorite color combinations and creative twists — your ideas might inspire the next adorable cat design.