The Amigurumi Strawberry Cake Crochet – PATTERN is a delightful and creative way to bring a touch of sweetness into your handmade collection. Combining the charm of amigurumi with the delicious aesthetics of a strawberry cake, this pattern is a favorite among crochet enthusiasts of all skill levels. It’s not just adorable – it’s also a great project to practice shaping, color changes, and decorative stitching.
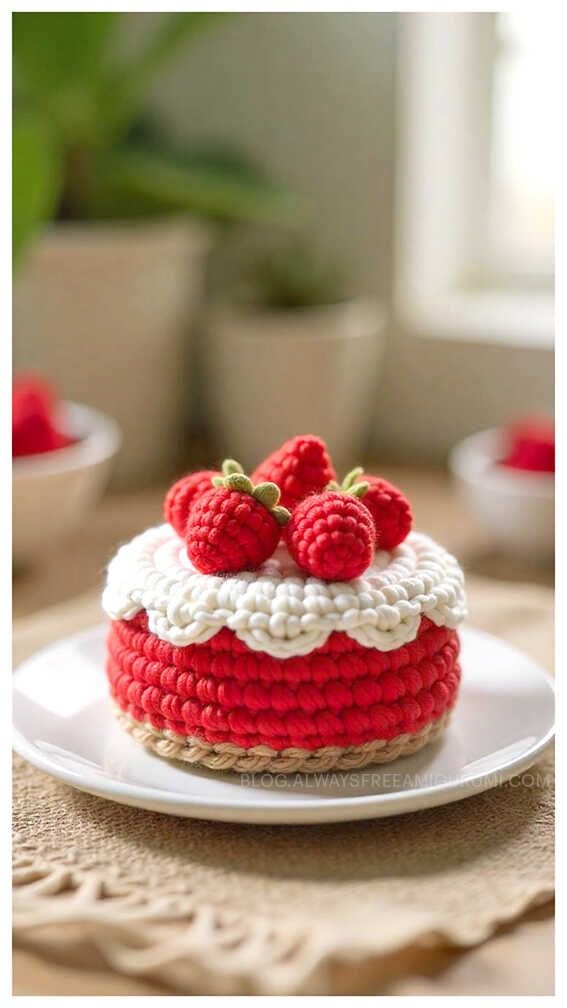
This project is perfect whether you’re crafting a cute gift, making play food for kids, or just adding a whimsical item to your crochet portfolio. The Amigurumi Strawberry Cake Crochet – PATTERN typically features multiple layers of cake, textured cream, and a bright red strawberry on top, all crocheted with soft yarns and stuffed for a plush, squeezable feel.
In this article, you’ll find a detailed guide to creating your very own crochet strawberry cake, including tips on materials, step-by-step techniques, variations, and answers to common questions. Let’s start stitching sweetness into reality!
1. Materials and Tools You’ll Need for the Amigurumi Strawberry Cake Crochet – PATTERN
Before you begin the Amigurumi Strawberry Cake Crochet – PATTERN, gather all the necessary tools and supplies to ensure a smooth crafting experience.
DISCOVER MORE FREE PATTERNS HERE!
The most common yarns used for this project are cotton or acrylic yarns in shades of cream, pink, red, and brown. Cotton yarn gives your project a cleaner look, while acrylic offers a softer, fluffier feel—great for plush toys.
A 2.5mm to 3.5mm crochet hook is typically ideal for amigurumi. The tighter stitches prevent stuffing from poking through and help the cake keep its shape.
You’ll also need polyester stuffing (fiberfill), which adds volume and makes the cake plush. Be sure to stuff evenly and firmly for a well-shaped dessert.
For decoration, embroidery floss or thinner yarn works great for adding “drizzle,” sprinkles, or seed details on the strawberry. Small beads or safety eyes can also be used for a fun touch.
A tapestry needle is essential for sewing the different parts together and weaving in ends. Choose one with a blunt tip and large eye for easier handling.
Lastly, stitch markers, scissors, and a pattern printout or digital copy will make your crafting process more organized and enjoyable.
2. Step-by-Step Guide to Creating Your Amigurumi Strawberry Cake
The Amigurumi Strawberry Cake Crochet – PATTERN typically consists of several parts: the cake base, the layers or frosting, and the strawberry topper. Here’s a breakdown of how to assemble it.
Start with the cake base. This part is usually worked in continuous rounds using a magic ring to form the bottom of the cake. Increase your stitches gradually to form a flat base, then build up the sides with single crochets.
Create the cake layers. You can add frosting lines using color changes or by stitching separate rings or decorative elements that wrap around the cake. Use white or pink to represent whipped cream between layers.
Make the top of the cake. This can be a flat or slightly domed circle, often the same size as the base. Add any desired texture by working back loops or adding popcorn stitches for cream texture.
Crochet the strawberry. This cute topper is usually a small red ball or cone shape, finished with a green leafy crown. Add white embroidery stitches to represent the seeds for extra detail.
Assemble your cake. Carefully sew the top and base to the sides, stuffing as you go. Attach the strawberry and any other decorations, like mini cherries, whipped cream spirals, or even candles for a birthday cake vibe.
Finish by weaving in all ends securely and adjusting the shape. Lightly press the cake with your hands to smooth out any uneven spots before displaying or gifting.
3. Creative Variations for Your Amigurumi Strawberry Cake Crochet – PATTERN
The beauty of the Amigurumi Strawberry Cake Crochet – PATTERN is in its versatility. Once you’ve mastered the basic structure, you can personalize it in countless fun and imaginative ways.
Change up the flavor! Use different yarn colors to represent other cake flavors – brown for chocolate, yellow for vanilla, or purple for ube. You can also layer colors for a rainbow cake effect.
Add toppings. Beyond the strawberry, you can crochet cherries, blueberries, or whipped cream swirls. These elements add character and let your project stand out.
Turn it into keychains or ornaments. By making a mini version using thinner yarn and a smaller hook, your amigurumi cake becomes a perfect keychain, bag charm, or holiday ornament.
Use textured stitches. Incorporate bobble stitches, puff stitches, or picot edging to simulate frosting, cream, or piped decorations on the cake’s surface.
Add a face. Turning your cake into a kawaii-style character by adding safety eyes, blushing cheeks, and a sweet embroidered smile brings even more charm and personality.
Incorporate scent. For a multisensory experience, you can tuck a small scented sachet (like strawberry or vanilla-scented beads) inside your cake to make it smell as sweet as it looks!
4. Tips for Success with the Amigurumi Strawberry Cake Crochet – PATTERN
Creating a perfect Amigurumi Strawberry Cake Crochet – PATTERN takes a bit of practice, but with these tips, you’ll be crafting adorable cakes in no time.
Keep your stitches tight. Loose stitches will let stuffing show through and might distort the shape. Always crochet with tension that keeps the fabric firm.
Count your stitches often. Since amigurumi is mostly done in continuous rounds, it’s easy to lose count. Use stitch markers and double-check each round to avoid mistakes.
Stuff gradually. Overstuffing or uneven stuffing can lead to lumpy cakes. Add stuffing slowly and press the piece to distribute it evenly.
Take your time with details. Small elements like the strawberry leaves or frosting accents may be fiddly, but they’re what make your project pop.
Block if needed. If your cake looks a bit wonky, lightly block it by steaming and shaping with your hands. This helps the yarn settle into the right shape.
Don’t be afraid to customize. Add names, special messages, or themed decorations for holidays or birthdays. Make it your own!
FAQ – Frequently Asked Questions About the Amigurumi Strawberry Cake Crochet – PATTERN
Q1: Is this pattern beginner-friendly?
A: Yes! While some details might require patience, the basic stitches used (single crochet, increase, decrease) are beginner-friendly.
Q2: How long does it take to make one cake?
A: Depending on your experience level, it can take anywhere from 3 to 6 hours to complete one full amigurumi strawberry cake.
Q3: Can I sell finished items made from this pattern?
A: In most cases, yes – but always check the pattern’s licensing terms. Many designers allow selling finished items with credit to the pattern source.
Q4: What size is the finished cake?
A: The standard size is about 3 to 5 inches tall, but this varies depending on the yarn and hook used.
Q5: What yarn weight works best?
A: DK or worsted weight yarn is ideal. It offers good structure while remaining soft and easy to shape.
Q6: Can I wash the amigurumi cake?
A: Spot cleaning is recommended. If necessary, hand wash gently and reshape while drying to maintain the structure.
Conclusion
The Amigurumi Strawberry Cake Crochet – PATTERN is a whimsical and rewarding project that combines technique, creativity, and charm. Whether you’re making one for fun, as a gift, or even to sell, this crochet dessert will surely bring smiles and admiration.
We explored all you need to get started: tools, step-by-step construction, creative variations, expert tips, and answers to common questions. From frosting swirls to tiny strawberries, this pattern lets your imagination soar.
If you enjoyed this guide, please leave your honest opinion and suggestions below. Have you tried the Amigurumi Strawberry Cake before? Share your version or tips with us—we’d love to see what you create!