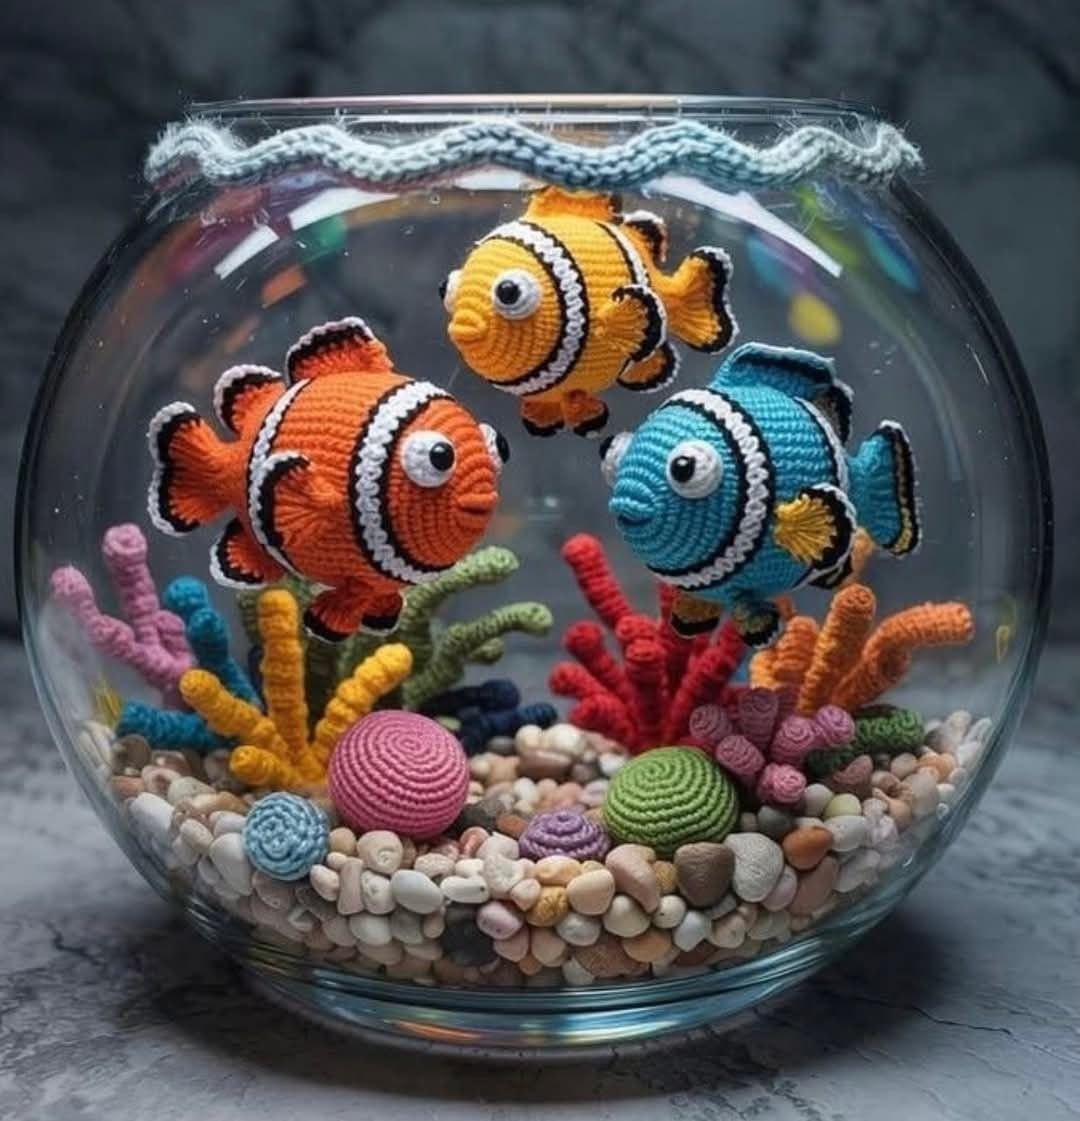
The Crocheted Fish – Tutorial is popular among crocheters because it is versatile and quick to complete. It can be used as a toy, decoration, keychain, or even as part of a themed nursery or ocean-inspired décor. With simple stitches and clear construction, this pattern suits both beginners and experienced crocheters.
In this article, you will learn everything you need to know about the Crocheted Fish – Tutorial, including materials, step-by-step construction, shaping tips, and finishing techniques.
1. Understanding the Crocheted Fish – Tutorial Concept
The Crocheted Fish – Tutorial is based on simple forms that come together to create a recognizable and playful fish shape. Most designs use basic increases and decreases to shape the body smoothly.
DISCOVER MORE FREE PATTERNS HERE!
One of the strengths of the Crocheted Fish – Tutorial is its simplicity. The project usually works in continuous rounds, helping crocheters practice stitch consistency and tension.
The tutorial approach makes the Crocheted Fish – Tutorial easy to follow. Clear steps guide you through the body, fins, and tail without overwhelming details.
Another appealing aspect is creativity. With the Crocheted Fish – Tutorial, color choices can dramatically change the final look, from realistic fish to whimsical fantasy designs.
The size of the project is also an advantage. A Crocheted Fish – Tutorial is small, portable, and ideal for quick crafting sessions.
Overall, the Crocheted Fish – Tutorial offers a fun way to practice shaping while creating a charming finished item.
2. Materials and Yarn Selection
Choosing the right yarn is essential for the Crocheted Fish – Tutorial. Most crocheters prefer cotton yarn because it provides good stitch definition and durability.
Acrylic yarn is also a popular option. In a Crocheted Fish – Tutorial, acrylic offers vibrant colors and is easy to care for.
Yarn weight affects the final size. Light worsted or DK yarn works well for a Crocheted Fish – Tutorial, creating a balanced and neat result.
Hook size matters too. Using the recommended hook ensures tight stitches, which is important for a Crocheted Fish – Tutorial if stuffing is involved.
Other materials include fiberfill stuffing, a yarn needle, and stitch markers. These tools help maintain shape in the Crocheted Fish – Tutorial.
With the right materials, your Crocheted Fish – Tutorial will look polished and professional.
3. Step-by-Step Construction and Shaping
Construction of the Crocheted Fish – Tutorial typically begins with the body. This part is worked in rounds, starting with a magic ring.
Increases are added gradually to shape the fish body. The Crocheted Fish – Tutorial uses simple math to keep the form symmetrical.
Once the body reaches the desired size, decreases are used. These steps in the Crocheted Fish – Tutorial create a smooth and rounded finish.
Fins and tails are often crocheted separately. Attaching them carefully ensures the Crocheted Fish – Tutorial looks balanced.
Stuffing is added slowly. In the Crocheted Fish – Tutorial, even stuffing helps maintain the intended shape.
Following the steps patiently results in a Crocheted Fish – Tutorial that looks neat and well-formed.
4. Finishing Touches, Uses, and Care
Finishing details bring the Crocheted Fish – Tutorial to life. Embroidered eyes or safety eyes add character.
Color accents can be added using surface crochet or embroidery. These details enhance the Crocheted Fish – Tutorial visually.
This project has many uses. A Crocheted Fish – Tutorial can become a toy, ornament, or educational prop.
For gifting, the Crocheted Fish – Tutorial is ideal. Handmade items like this are thoughtful and unique.
Caring for your finished piece is simple. Gentle hand washing keeps the Crocheted Fish – Tutorial looking fresh.
With proper care, a Crocheted Fish – Tutorial can last for years as a cherished handmade item.
FAQ
Is the Crocheted Fish – Tutorial suitable for beginners?
Yes, it uses basic stitches and clear shaping steps.
What yarn is best for this project?
Cotton or acrylic yarn works well for a Crocheted Fish – Tutorial.
How long does it take to make?
Most crocheters finish a Crocheted Fish – Tutorial in a few hours.
Can I change the size?
Yes, adjusting yarn weight and hook size changes the final dimensions.
Is this safe for children?
It can be, but embroidered features are recommended for young children.
Can I sell items made from this tutorial?
Check individual pattern permissions, but many allow small-scale sales.
Conclusion
In this article, we explored the Crocheted Fish – Tutorial, covering its concept, materials, construction steps, and finishing ideas. This project is a wonderful way to practice crochet shaping while creating a playful and versatile item.
PATTERN VIDEO:
We would love to hear your honest opinion about this tutorial. Please leave your feedback and share suggestions for future crochet content.