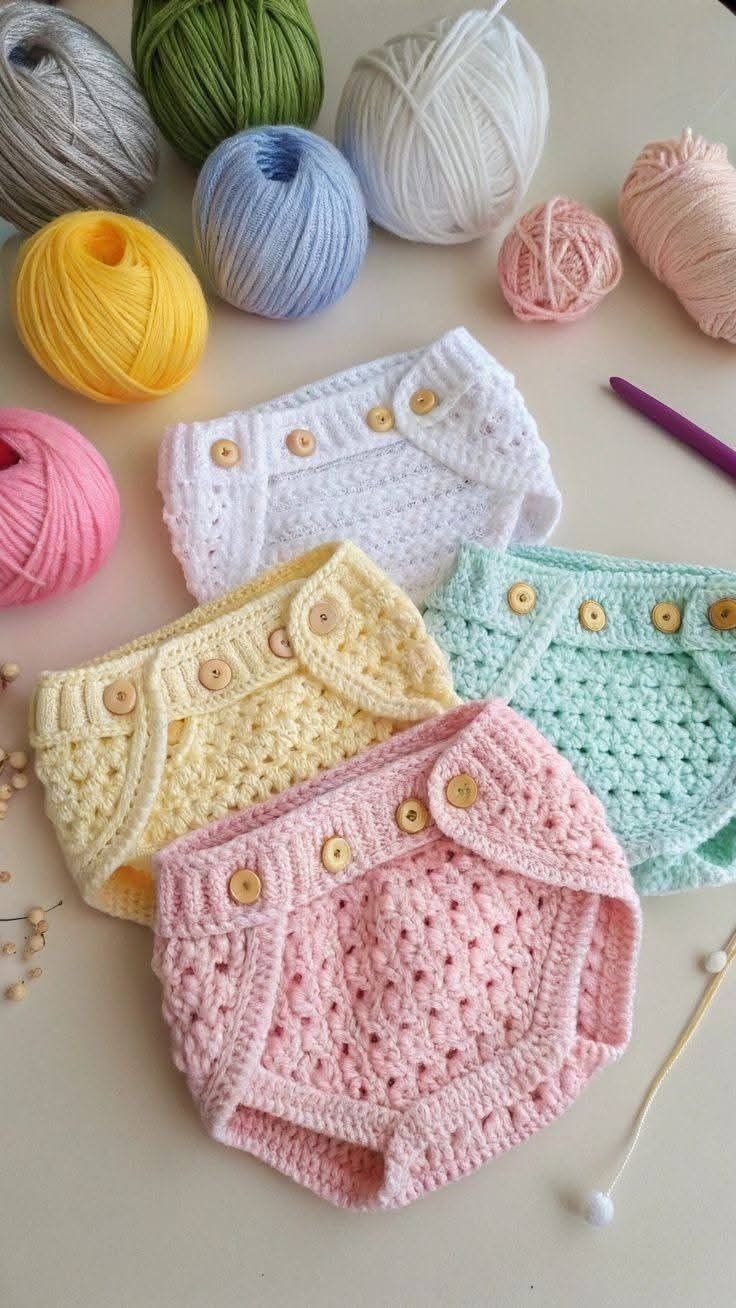
If you’re on the lookout for a charming and practical crochet project for little ones, the Crochet Baby Bloomers – Crochet Tutorial is exactly what you need. Baby bloomers are timeless garments that add a cute touch to any baby outfit while keeping diapers comfortably covered. Whether you’re crafting for your own child, a baby shower gift, or a small shop, this tutorial will walk you through every step.
The great thing about crochet baby bloomers is that they’re quick to make, beginner-friendly, and endlessly customizable. You can adjust the size, play with colors, or add decorative elements like ruffles, buttons, and bows to match your personal style. They’re especially adorable paired with crochet baby dresses, onesies, or summer tops.
In this Crochet Tutorial, we’ll guide you from the very first stitch to the final finishing touch. Using basic techniques and simple shaping, you’ll be able to create bloomers that are both functional and adorable. Let’s begin!
1. Choosing Materials and Preparing Your Workspace
The success of your Crochet Baby Bloomers – Crochet Tutorial starts with selecting the right materials. Choosing quality yarn and the right hook size makes all the difference in both the look and comfort of the finished piece.
DISCOVER MORE FREE PATTERNS HERE!
For baby items, soft cotton or cotton-blend yarns are the best choice. They are breathable, gentle on sensitive skin, and easy to wash. Look for yarns labeled “baby” or “DK weight” for optimal softness and durability.
Select a crochet hook size that complements your yarn. Most DK yarns work well with 3.5mm to 4mm hooks. Check your yarn label for suggestions, and be sure to test your gauge before starting the pattern to ensure the final size fits as expected.
You’ll also need a tape measure, scissors, stitch markers, and a yarn needle for weaving in ends. These small tools help ensure accuracy and a polished finish, especially when working with shaping.
Before you begin, make sure your workspace is clean, well-lit, and comfortable. This will help you enjoy the process and avoid mistakes caused by eye strain or distractions.
Finally, download or save a copy of the pattern you’re using, or follow this Crochet Tutorial step-by-step as you work. Having the instructions nearby will keep you on track and help prevent errors.
2. Beginning the Bloomers: Waistband and Body
The waistband is the first step in the Crochet Baby Bloomers – Crochet Tutorial. This section not only provides structure but ensures the bloomers stay snug and comfortable on the baby’s waist.
You’ll begin by chaining the required number of stitches for your size. Most baby bloomers are made in sizes like 0–3 months, 3–6 months, etc. Adjust your foundation chain based on the intended size.
Next, join the chain into a round, being careful not to twist it. This will be the beginning of your waistband. Use stitch markers to identify your first stitch as you work in the round.
The waistband is usually worked in single crochet (sc) or half double crochet (hdc) with a few rounds of ribbing for stretch. You can create a ribbed effect by working in back loops only (BLO) or by using front post and back post stitches.
Once the waistband is done, you’ll start the main body of the bloomers by increasing the stitch count to create a looser, more comfortable fit over the diaper area.
Continue working in the round, maintaining a consistent tension and using your stitch markers to track progress. The body of the bloomers can be as short or long as you like depending on your style preference.
Add a few decorative stitches if desired, such as puff stitches, shells, or eyelet rows to give your bloomers a unique and elegant touch.
3. Shaping the Leg Openings and Seaming
Shaping is a crucial step in the Crochet Baby Bloomers – Crochet Tutorial, giving the garment its distinctive silhouette and ensuring comfort and flexibility for baby’s legs.
After finishing the main body, you’ll divide your stitches to create two leg openings. You may do this by counting half of your stitches and either fastening off or continuing around one half to form the first leg.
Work in the round to form each leg cuff. Typically, the legs are shorter than the waistband and might include a simple ribbing or scalloped edging for cuteness. You can even add ruffles for a frilly look.
Use decreases sparingly if needed to gently taper the leg openings. This ensures a snug fit without being too tight for the baby’s thighs.
Repeat the same process for the second leg, ensuring both cuffs match in stitch count and height. Double-check your stitch markers and use your tape measure if needed.
If your bloomers have a center seam (some patterns do), you’ll need to stitch it closed with a yarn needle. Use a mattress stitch or whip stitch for a clean finish.
Weave in all your loose ends carefully, and gently steam or block the bloomers if necessary to shape and soften the stitches.
4. Customizing and Final Touches
One of the most delightful parts of this Crochet Baby Bloomers – Crochet Tutorial is the ability to personalize your project. A few simple additions can transform your bloomers from basic to breathtaking.
Consider adding a drawstring to the waistband using a chain stitch cord. You can weave it through eyelet rows or under the ribbing for an adjustable fit and decorative flair.
Ruffles are a popular addition to baby bloomers. Crochet rows of shells or layered ruffles onto the back or legs for a feminine and fun finish.
Buttons, bows, or tiny appliqués like hearts, flowers, or even tiny animals can make the bloomers extra adorable. Just be sure to securely sew any embellishments to avoid choking hazards.
You can also crochet a matching headband or baby bonnet to go with the bloomers, creating a beautiful handmade gift set.
Switch up your yarn colors to make themed bloomers — like pastel pinks for spring or festive reds and greens for the holidays.
Finally, consider attaching a small care label or handwritten tag if you’re gifting or selling your crochet creation. It adds a special personal touch and gives the recipient guidance on washing and care.
Frequently Asked Questions (FAQ)
Can beginners follow the Crochet Baby Bloomers – Crochet Tutorial?
Yes! This tutorial is beginner-friendly and uses basic stitches like single crochet and half double crochet. Clear instructions and stitch markers make it manageable for new crocheters.
What size are the bloomers in this tutorial?
The basic size fits 0–3 months, but you can easily adjust the foundation chain and row count to accommodate other sizes. Refer to baby sizing charts for more accuracy.
What type of yarn is best for baby bloomers?
Soft cotton or cotton blends are ideal. They are breathable, washable, and gentle on baby skin. Look for DK or light worsted weight labeled for baby items.
Can I machine wash crochet baby bloomers?
Yes, if you use machine-washable yarn. Always check your yarn label. Air drying is usually best to preserve the shape and softness of your work.
How long does it take to crochet baby bloomers?
Most bloomers can be completed in a few hours to a day, depending on your skill level and desired customization. It’s a quick and satisfying project.
Can I sell bloomers made from this tutorial?
Absolutely! Handmade baby items are very popular. Just be sure to credit the original pattern if it’s required by the designer and always follow safety guidelines.
Conclusion
The Crochet Baby Bloomers – Crochet Tutorial is a fun and rewarding project that brings both beauty and function to handmade babywear. You’ve learned how to choose materials, shape the waistband and legs, and add unique finishing touches that make your creation stand out.
Whether you’re gifting these bloomers or selling them in your shop, you’re offering something crafted with love and care. The possibilities for customization are endless — and so is the joy of seeing a baby wear something you made with your own hands.
PATTERN VIDEO:
We’d love to hear from you! Drop your honest opinion below and share your suggestions, tips, or photos of your finished bloomers. Let’s inspire each other in the crochet community!