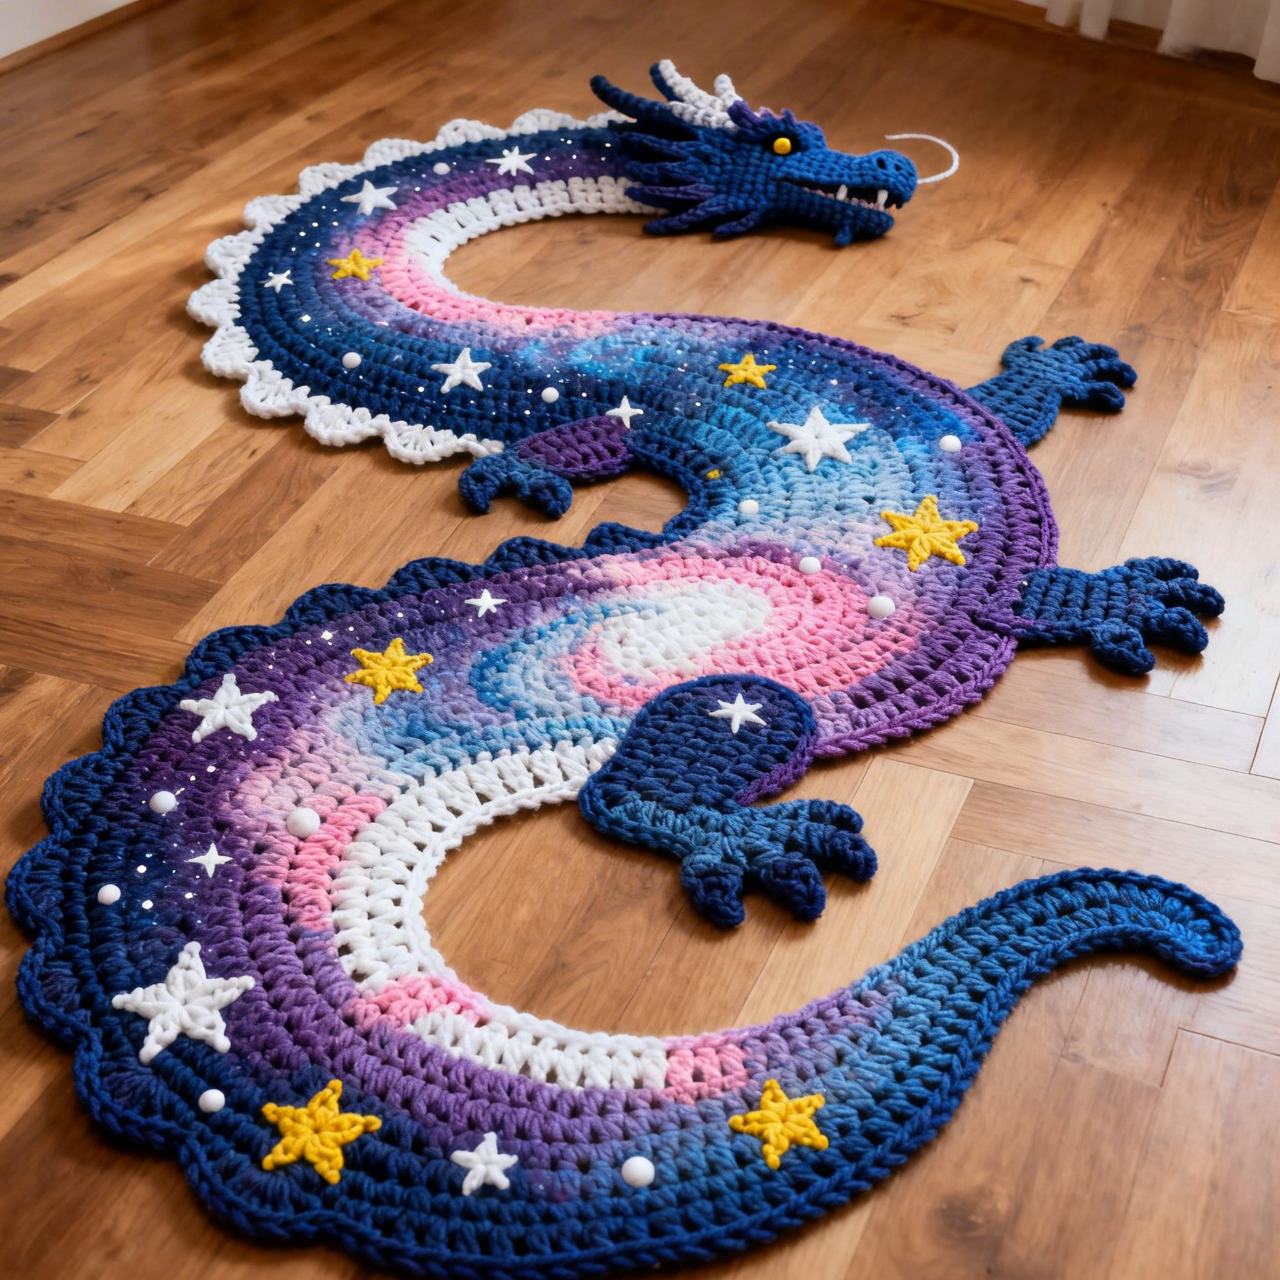
Creating a Dragon Rug Made in Crochet – TUTORIAL is an exciting project for any crochet enthusiast. This unique rug combines creativity, skill, and imagination, resulting in a striking piece that can bring life to any room. Whether you are an experienced crocheter or just starting out, this tutorial will guide you step by step to create your own magical dragon-inspired rug.
The Dragon Rug Made in Crochet – TUTORIAL allows crafters to explore different textures, colors, and stitches. Each section of the dragon can be customized, making it truly one-of-a-kind. From the scales to the wings and tail, this rug transforms ordinary yarn into a work of art.
Not only is this project fun, but it also provides a relaxing and satisfying experience. The Dragon Rug Made in Crochet – TUTORIAL is perfect for personal use, gifts, or even as a centerpiece in a child’s bedroom. By following the instructions carefully, you can achieve professional-looking results without needing advanced techniques.
1. Materials Needed for Your Dragon Rug
Before starting the Dragon Rug Made in Crochet – TUTORIAL, it’s important to gather all the necessary materials. First, choose high-quality yarn in vibrant colors. You’ll need shades of green, red, or any color combination that fits your dragon vision.
DISCOVER MORE FREE PATTERNS HERE!
Next, select a crochet hook that matches the thickness of your yarn. The hook size will influence the texture and tightness of your stitches. Using the recommended hook ensures the rug holds its shape properly.
Scissors, stitch markers, and a yarn needle are essential tools. Stitch markers help track your progress, especially when shaping the dragon’s body and wings. A yarn needle is necessary for weaving in ends and assembling pieces.
Optional materials include non-slip backing if you plan to place the rug on smooth surfaces. This ensures safety and prevents the rug from sliding.
Having a printed version of the Dragon Rug Made in Crochet – TUTORIAL can also help keep track of each step without constantly switching screens or devices.
Finally, patience and creativity are key materials. Crafting a dragon rug takes time, but the end result is a stunning piece that will be admired for years.
2. Step-by-Step Crochet Techniques
The Dragon Rug Made in Crochet – TUTORIAL uses basic crochet stitches such as single crochet, double crochet, and slip stitch. These stitches form the foundation of your dragon’s body, scales, and wings.
Start with the center of the rug, typically the dragon’s body. Use circular or oval crochet techniques to create a smooth and even shape. Ensure your tension remains consistent throughout to avoid uneven sections.
Next, work on the scales. Scales can be made using layered stitches or a simple bobble stitch technique. Each scale adds dimension and texture, giving your dragon a realistic appearance.
For the wings, you can use a combination of stitches to create a delicate but sturdy structure. Wings can be flat or slightly raised for a 3D effect. Play with colors to enhance the design.
Don’t forget the tail and claws. These details add character to your dragon rug. Crocheting them separately and attaching them to the main body can make assembly easier.
Finally, weave in all loose ends carefully. Proper finishing ensures your Dragon Rug Made in Crochet – TUTORIAL looks polished and professional, ready to display in your home.
3. Tips for Customizing Your Dragon Rug
One of the joys of the Dragon Rug Made in Crochet – TUTORIAL is customization. You can choose yarn textures, colors, and stitch patterns to reflect your personal style.
Consider using variegated yarn for a dynamic, multi-colored effect. This adds depth and visual interest to the dragon’s body and scales.
Adding beads or small embellishments can create eyes or accents on the wings. Just ensure they are securely attached to avoid hazards, especially if the rug will be used in a child’s room.
You can also experiment with different sizes. Make a large rug for a living room or a smaller one for a cozy corner. Adjusting the scale requires minor changes in stitch counts but can significantly impact the overall effect.
Incorporating raised textures, such as popcorn stitches for the scales, enhances the tactile experience. This makes the rug not only visually appealing but also fun to touch.
Finally, don’t be afraid to mix techniques. Combining crochet with embroidery for details like the dragon’s eyes or claws can elevate your Dragon Rug Made in Crochet – TUTORIAL to a truly unique piece.
4. Caring for Your Dragon Rug
Proper care ensures your Dragon Rug Made in Crochet – TUTORIAL lasts for years. Start by gently washing the rug with mild detergent and cold water. Avoid harsh chemicals that can damage the yarn.
Air drying is preferable. Lay the rug flat to maintain its shape and prevent stretching. Avoid hanging, which can distort delicate areas such as wings or tails.
Regular vacuuming helps keep the rug clean and free from dust. Use a gentle setting to avoid pulling on the crochet stitches.
For high-traffic areas, consider a rug pad underneath to provide stability and reduce wear. This also helps maintain the dragon’s shape over time.
Store the rug in a cool, dry place if not in use. Avoid direct sunlight, which can fade vibrant yarn colors.
Finally, inspect the rug periodically for loose stitches or damage. Repairing small issues early ensures your Dragon Rug Made in Crochet – TUTORIAL remains in excellent condition.
FAQ
Q1: Can beginners make the Dragon Rug Made in Crochet?
A1: Yes, beginners can attempt this tutorial by starting with basic stitches and following the step-by-step instructions. Patience is key.
Q2: How long does it take to complete the rug?
A2: Depending on size and detail, it can take several days to a few weeks. Smaller rugs with simple designs take less time.
Q3: What types of yarn are best for this project?
A3: Medium to bulky yarn works well. Acrylic or cotton yarn is durable and easy to clean.
Q4: Can I customize the dragon’s colors?
A4: Absolutely! Customization is encouraged. Choose colors that match your room or personal preference.
Q5: How do I prevent the rug from slipping on smooth floors?
A5: Add a non-slip backing or use a rug pad to keep it stable and safe.
Q6: Is it possible to make the rug larger or smaller?
A6: Yes, adjust the stitch count and proportions to scale the dragon to any size desired.
Conclusion
Creating a Dragon Rug Made in Crochet – TUTORIAL is a rewarding experience that combines creativity, technique, and patience. Throughout this article, we explored the necessary materials, step-by-step techniques, customization tips, and care instructions. Following these steps allows anyone to craft a unique and impressive dragon rug.
We encourage you to share your results, leave honest feedback, and suggest any improvements or ideas for future projects. Every creation is special, and your experience can inspire others to try this magical crochet journey.

