
Dog Coat Pattern is the perfect sewing project for pet lovers who enjoy creating beautiful, practical, and comfortable accessories by hand. A handmade dog coat not only helps keep your furry companion warm during chilly weather but also allows you to showcase your creativity through quilting techniques, beautiful fabric combinations, and thoughtful design details. Whether you’re sewing for your own dog or making a heartfelt gift for another pet owner, this Dog Coat Pattern is a rewarding project that combines functionality with timeless handmade charm.
One of the greatest advantages of the Dog Coat Pattern is its versatility. The simple construction makes it suitable for beginner sewists, while experienced quilters can personalize every detail with decorative quilting, embroidered names, colorful bindings, or premium fabrics. The wrap-around design offers an adjustable fit, making it comfortable for a variety of small and medium-sized dog breeds while allowing easy movement during walks and playtime.
Throughout this tutorial, you will learn how to choose the best materials, prepare the fabric, cut the pattern pieces, quilt the layers, assemble the coat, install secure closures, and finish every detail with professional sewing techniques. By the end of this guide, you’ll have a durable and attractive Dog Coat Pattern that provides warmth, comfort, and style for your four-legged companion.
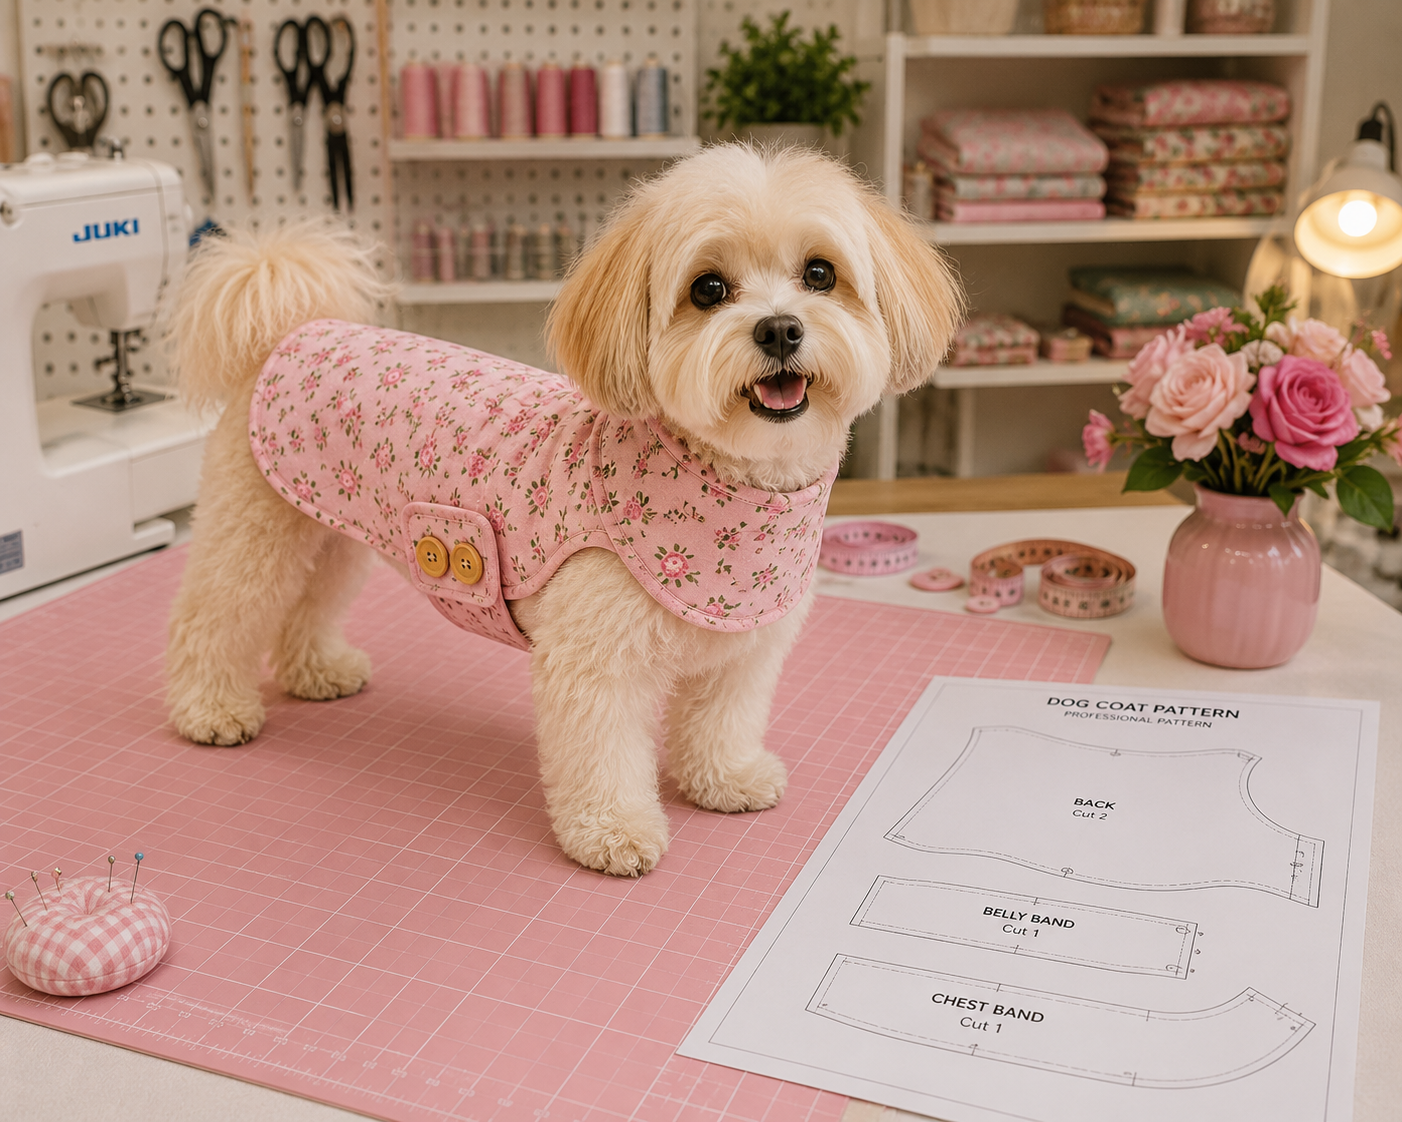
Choosing Materials for Your Dog Coat Pattern
Selecting quality materials is the foundation of a successful Dog Coat Pattern. Quilting cotton is an excellent choice for the exterior because it is durable, easy to sew, and available in countless beautiful prints. Floral fabrics, gingham, modern solids, and seasonal prints all create charming finished coats.
DISCOVER MORE FREE PATTERNS HERE!
For additional warmth, include a layer of cotton batting or lightweight quilt batting between the outer fabric and the lining. This extra layer provides insulation while maintaining flexibility so your dog can move comfortably.
The lining should be soft against your pet’s coat. Cotton flannel, brushed cotton, or lightweight fleece are excellent options depending on the climate where the coat will be worn. Smooth linings also reduce friction and help prevent matting in long-haired breeds.
Additional sewing supplies include coordinating thread, rotary cutter, quilting ruler, cutting mat, sewing machine, fabric scissors, pins or sewing clips, measuring tape, washable fabric marker, and an iron for pressing throughout the project.
For the closure system, choose hook-and-loop tape, durable snaps, or sturdy buttons with elastic loops. Adjustable closures allow the coat to fit comfortably while making it easy to put on and remove.
Before cutting any fabric, measure your dog carefully. Record the neck circumference, chest circumference, back length from the base of the neck to the tail, and the distance between the front legs. Accurate measurements ensure your Dog Coat Pattern fits comfortably without restricting movement.
Cutting and Quilting the Main Coat Pieces
Begin by transferring the Dog Coat Pattern onto pattern paper or directly onto your fabric using a washable fabric marker. The main body piece should extend comfortably from the neck to just before the tail while allowing freedom around the shoulders.
Cut one outer fabric piece, one lining piece, and one batting piece using the same pattern template. Keeping all layers identical makes assembly much easier and helps achieve smooth edges.
Create a quilt sandwich by placing the lining wrong side down, positioning the batting on top, and placing the outer fabric right side up. Smooth every layer carefully before securing them with quilting pins or temporary spray adhesive.
Quilt the layered fabric using straight-line quilting, diagonal grids, gentle curves, or simple free-motion designs. Decorative quilting adds visual appeal while preventing the batting from shifting during regular use and washing.
After quilting, trim the edges neatly back to the original pattern shape. Precise trimming ensures clean seam allowances and helps the binding sit smoothly around the finished coat.
Press the quilted body thoroughly before continuing. Well-pressed fabric creates crisp edges and contributes to the polished appearance of the completed Dog Coat Pattern.
Constructing the Belly Band, Chest Strap, and Closures
The adjustable belly band is one of the most important components of the Dog Coat Pattern because it secures the coat comfortably around your dog’s body. Cut the belly band according to your measurements, adding seam allowances and enough overlap for the chosen closure.
Interface the belly band if additional stability is desired. Sew the outer fabric, batting, and lining together before turning the piece right side out and topstitching around the edges for a clean, professional finish.
Next, prepare the chest strap using the same construction method. Position it carefully so it rests naturally across the front of the dog’s chest without restricting shoulder movement or placing pressure on the neck.
Attach both straps securely to the quilted body using reinforced stitching. Since these attachment points experience the greatest amount of movement, sew multiple rows of stitching to maximize durability.
Install the chosen closure system. Hook-and-loop tape is especially popular because it allows quick adjustment and accommodates slight size variations. Snaps and decorative buttons also provide attractive finishing options while keeping the coat secure.
Once the closures are attached, test the fit on your dog. Check that the coat sits comfortably along the back, wraps securely around the chest, and allows unrestricted movement during walking, sitting, and lying down.
Finishing Touches, Personalization, and Care
Apply coordinating quilt binding around the entire outer edge of the coat. Bias binding is especially useful because it curves smoothly around rounded corners while providing a durable and attractive finish.
Personalizing your Dog Coat Pattern adds a special handmade touch. Embroider your dog’s name, add decorative appliqué shapes, include quilt blocks, or use contrasting piping to create a unique design that reflects your pet’s personality.
This project also makes a thoughtful handmade gift for friends and family who love their pets. A custom-made coat paired with a matching leash holder, treat pouch, or bandana creates a beautiful handmade gift set for birthdays, holidays, or pet adoption celebrations.
To keep the finished coat looking its best, machine wash it on a gentle cycle using mild detergent. Air drying or tumble drying on low heat helps preserve both the quilting and the overall shape of the garment.
As your sewing skills continue to grow, experiment with reversible designs, waterproof outer fabrics, fleece linings, reflective trim for evening walks, or seasonal fabric collections. Every new version allows you to improve your craftsmanship while creating practical accessories for your pet.
Most importantly, enjoy the creative process. Every completed Dog Coat Pattern represents patience, skill, and love. Handmade pet accessories combine comfort, protection, and beautiful craftsmanship into a project that both you and your furry companion can enjoy for many seasons.
Frequently Asked Questions
Is the Dog Coat Pattern suitable for beginner sewists?
Yes. This project uses basic quilting and sewing techniques, making it an excellent choice for beginners who want to practice garment construction on a smaller scale.
What fabric works best for a dog coat?
Quilting cotton is ideal for the outer layer, while soft flannel or fleece makes a comfortable lining. Lightweight batting adds warmth without excessive bulk.
How do I measure my dog correctly?
Measure the neck circumference, chest circumference, back length from the base of the neck to the tail, and the distance between the front legs before cutting the pattern.
Can I make different sizes?
Absolutely. The same Dog Coat Pattern construction can easily be adjusted for small, medium, or large dogs by modifying the measurements while keeping the same assembly process.
Which closure is best?
Hook-and-loop tape is the most adjustable option, but snaps and buttons with elastic loops also work well depending on your preferred style.
Can I make the coat reversible?
Yes. By using two decorative fabrics instead of a traditional lining, you can create a fully reversible dog coat with two different looks.
Is batting necessary?
Batting is recommended if you want additional warmth and the classic quilted appearance, but lightweight versions can be made without batting for warmer climates.
How should I wash the finished coat?
Machine wash on a gentle cycle with mild detergent and allow it to air dry or tumble dry on low heat to preserve the quilting and fabric quality.
Conclusion
The Dog Coat Pattern is a practical, enjoyable, and rewarding quilt sewing project that combines comfort, durability, and handmade style. Throughout this tutorial, you learned how to choose appropriate materials, measure your dog accurately, quilt the fabric layers, construct the body and adjustable straps, install secure closures, and finish the coat with professional sewing techniques.
Whether you’re creating a warm everyday coat for your own pet or making a thoughtful handmade gift for another dog lover, this project offers an excellent opportunity to improve your quilting and sewing skills while producing a beautiful accessory that will be appreciated for years.
If you enjoyed this Dog Coat Pattern tutorial, we would love to hear from you. Please leave your honest opinion, share your sewing experience, and let us know your suggestions for future quilt and sewing patterns. Your sincere feedback helps inspire new creative projects and supports a growing community of passionate makers.