
Fabric Toiletry Bag Pattern is a practical and stylish sewing project for anyone who enjoys creating useful handmade accessories. Inspired by the structured purple toiletry bags shown in the reference image, this project combines a clean rectangular shape, a secure zipper closure, a convenient side handle, and optional lining or interfacing to create a bag that looks polished while remaining functional. It is an excellent project for organizing toiletries, cosmetics, sewing supplies, travel accessories, or other small essentials.
One of the best features of this Fabric Toiletry Bag Pattern is its versatility. You can make the exterior from quilting cotton, canvas, denim, home décor fabric, or another medium-weight material. A coordinated lining can add personality to the interior, while fusible interfacing or foam stabilizer provides enough structure to help the bag maintain its boxy shape. The finished design can be elegant and minimal like the purple version in the image, or colorful and playful using floral, patchwork, geometric, or contrasting fabrics.
This tutorial walks through the complete construction process, including planning the dimensions, preparing the pattern pieces, installing the zipper, adding the side handle, creating boxed corners, inserting the lining, and finishing the seams. The suggested finished size is approximately 10 inches wide × 6 inches high × 4 inches deep (25.5 × 15 × 10 cm), making it large enough for everyday essentials without becoming bulky. The measurements can also be adjusted easily if you want a smaller cosmetic pouch or a larger travel organizer.
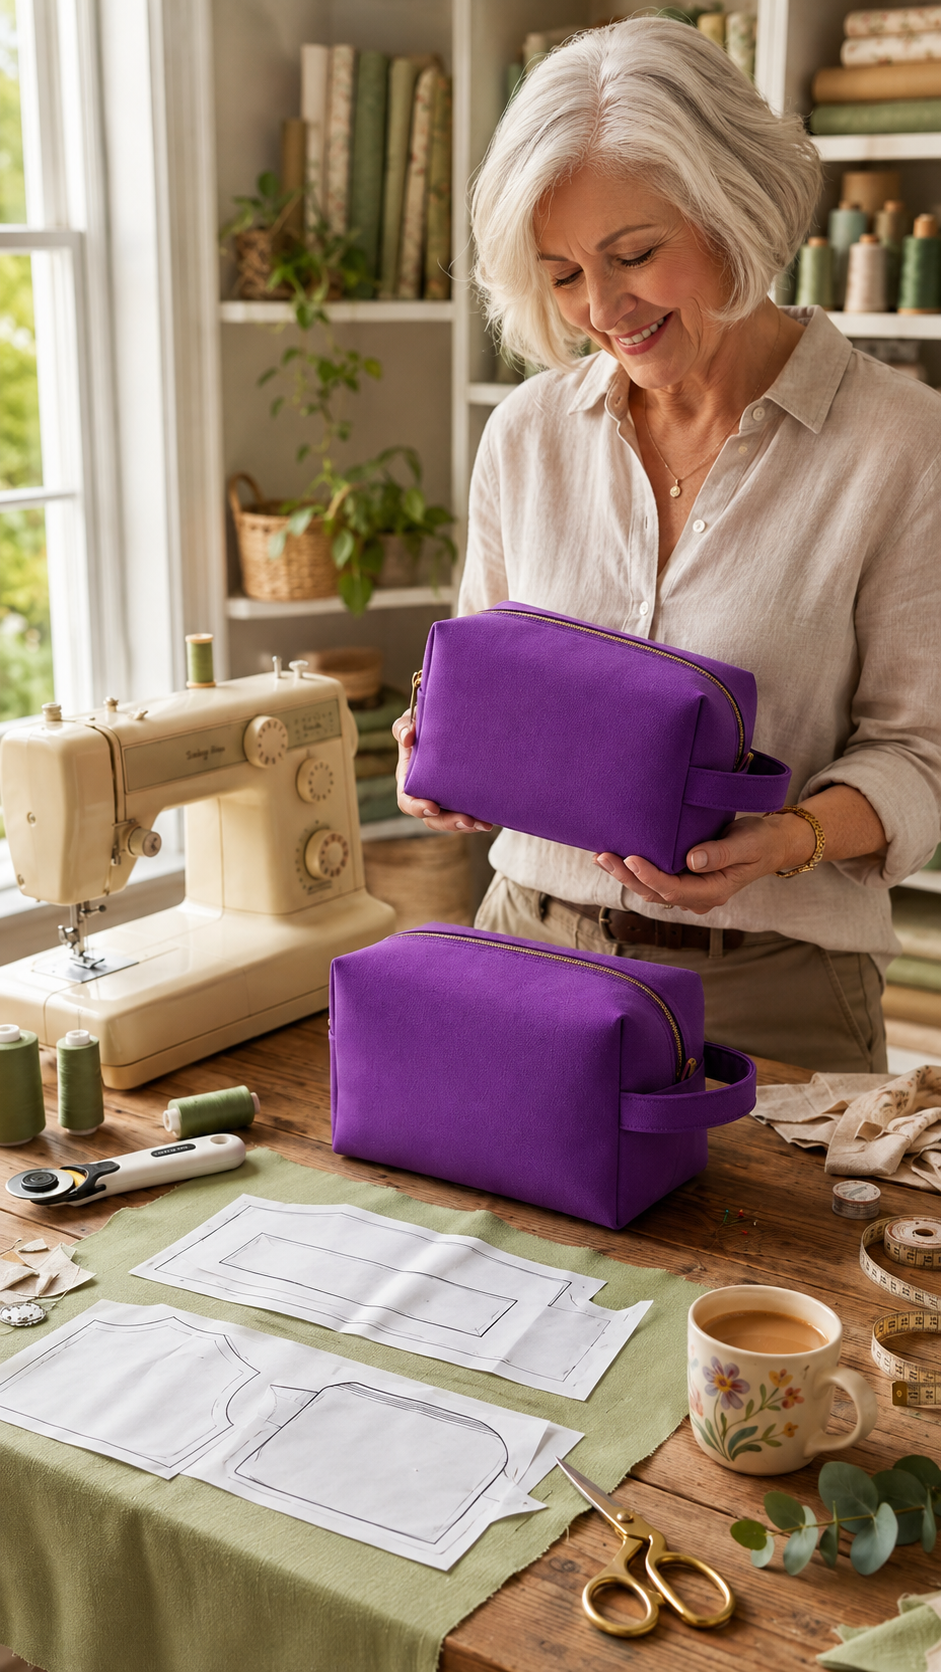
Materials, Measurements, and Cutting the Fabric Pieces
Begin your Fabric Toiletry Bag Pattern by choosing a durable exterior fabric. Medium-weight cotton canvas is particularly suitable because it provides structure without being excessively difficult to sew. Quilting cotton can also work beautifully, especially when reinforced with fusible interfacing.
DISCOVER MORE FREE PATTERNS HERE!
For the exterior, prepare two main rectangular pieces measuring approximately 11 × 8 inches (28 × 20 cm). These will eventually become the front and back sections of the toiletry bag. The extra dimensions allow room for seams and the depth created by the boxed corners.
Cut two lining pieces using the same 11 × 8-inch (28 × 20 cm) measurements. Cotton is a simple choice for the lining, while laminated or water-resistant fabric can be considered when the bag will regularly carry toiletries. If using coated fabric, test your sewing-machine settings on a scrap before assembling the project.
You will also need two pieces of fusible interfacing matching the exterior rectangles. Medium-weight interfacing provides a flexible bag, while fusible fleece or thin foam stabilizer creates a more structured result similar to the project shown in the image. Follow the manufacturer’s instructions when applying any stabilizer.
Prepare one strip approximately 6 × 2 inches (15 × 5 cm) for the side handle. If you prefer a larger wrist-style handle, increase the strip to approximately 8 × 2 inches (20 × 5 cm). Fold the long edges toward the center, fold the entire strip in half, press, and topstitch both long edges.
Finally, prepare a zipper approximately 12 inches (30 cm) long. Using a zipper slightly longer than the bag width makes installation easier because the zipper pull can be moved outside the sewing area. Nylon coil zippers are especially convenient because they can be shortened easily after installation.
Installing the Zipper and Building the Main Bag Panels
Place one exterior panel right side up on your work surface. Position the zipper along the upper edge with the zipper teeth facing downward toward the exterior fabric. Align the zipper tape with the raw fabric edge and clip or pin it securely.
Place one lining panel over the zipper with its right side facing the exterior fabric. The zipper should now be sandwiched between the exterior and lining layers. Using a zipper foot, sew along the upper edge approximately 1/4 inch (6 mm) from the zipper tape edge.
Fold both fabric layers away from the zipper and press carefully. Topstitch approximately 1/8 inch (3 mm) from the folded fabric edge. This step helps prevent the lining from becoming trapped in the zipper teeth and gives the Fabric Toiletry Bag Pattern a professional finish.
Repeat the same process with the opposite side. Place the second exterior piece right side up, position the remaining zipper edge over it, and place the second lining piece on top. Sew through the three layers, open them out, press, and topstitch.
Before continuing, test the zipper several times. It should open and close without catching the lining. Correcting alignment problems now is much easier than after the side seams have been completed.
At this stage, the exterior and lining should hang from opposite sides of the zipper. Open the zipper at least halfway before proceeding. This is extremely important because the opening will later provide the easiest way to turn the completed bag right side out.
Sewing the Handle, Side Seams, and Boxed Corners
The side handle is one of the most practical details in this Fabric Toiletry Bag Pattern. Take the prepared handle strip and fold it in half to create a loop. Position both raw ends along one exterior side edge, approximately 1–1.5 inches (2.5–4 cm) below the zipper.
Baste the handle to the exterior fabric using a seam allowance smaller than the final seam allowance. Make sure the loop itself points inward toward the center of the bag. Only the raw ends should extend into the seam allowance.
Now bring the two exterior pieces right sides together and the two lining pieces right sides together. Match the zipper seams carefully. Pin or clip around the perimeter. Sew around the exterior and lining using approximately a 3/8-inch (1 cm) seam allowance.
Leave an opening of approximately 4 inches (10 cm) along the bottom of the lining. This opening will be used later for turning the entire bag. Reinforce the stitches at both ends of the opening so they do not unravel during turning.
To create the characteristic rectangular toiletry-bag shape, form boxed corners. At each exterior bottom corner, pinch the fabric so the side seam aligns with the bottom seam. Flatten the corner into a triangle and measure approximately 2 inches (5 cm) inward from the point.
Draw a line perpendicular to the seam and stitch directly across it. Repeat on the other exterior corner and on both lining corners. Trim the triangular excess approximately 1/4–3/8 inch (6–10 mm) beyond the stitching. These boxed corners transform a flat pouch into a spacious three-dimensional bag.
Turning, Finishing, and Customizing Your Toiletry Bag
Carefully pull the project through the opening left in the lining. Work gradually so you do not place excessive stress on the zipper or corners. Once the exterior appears, gently push each corner outward using a blunt turning tool.
Pull the lining completely outside the bag and inspect the seams. Fold the raw edges of the turning opening inward approximately 3/8 inch (1 cm) and press. Close the opening with a narrow machine stitch or an invisible ladder stitch by hand.
Push the lining inside the toiletry bag and shape all four corners. Press the exterior carefully according to the fabric type. If you used foam stabilizer, avoid applying excessive heat or pressure because it can permanently flatten the foam.
For additional structure, you can add another row of topstitching near the zipper or along selected seams. A stitch length of approximately 3 mm generally creates attractive visible topstitching. Choose coordinating thread for a subtle appearance or contrasting thread when you want the stitching to become part of the design.
You can personalize the Fabric Toiletry Bag Pattern by adding interior pockets before assembly. Cut a rectangle of lining fabric, hem its upper edge, position it on one lining panel, and stitch around the sides and bottom. Vertical stitching can divide one large pocket into several smaller compartments.
The finished bag can also be customized with embroidery, appliqué, quilting, patchwork panels, labels, decorative zipper pulls, contrasting handles, or piping. Once you understand the basic construction, the same pattern can become a coordinated collection of cosmetic bags, travel organizers, craft pouches, or handmade gifts.
FAQ About the Fabric Toiletry Bag Pattern
What is the approximate finished size of this Fabric Toiletry Bag Pattern?
The suggested finished size is approximately 10 inches wide × 6 inches high × 4 inches deep (25.5 × 15 × 10 cm). Small variations are normal depending on seam allowance and corner construction.
Is this project suitable for beginners?
Yes. A beginner who is comfortable sewing straight seams can complete this project. Zipper installation and boxed corners may require additional attention, but both are useful techniques to learn.
What is the best fabric for a toiletry bag?
Medium-weight cotton, canvas, denim, and home décor fabrics are excellent options. Lightweight quilting cotton works best when reinforced with interfacing.
Do I need interfacing?
Interfacing is strongly recommended if you want the bag to maintain its shape. Without interfacing, lightweight cotton can produce a much softer pouch.
Can I use fusible fleece?
Yes. Fusible fleece provides softness and moderate structure. Thin foam stabilizer creates an even firmer, more defined bag.
What zipper length should I use?
For the dimensions in this tutorial, a zipper approximately 12 inches (30 cm) long is convenient.
Can I use a longer zipper?
Yes. A longer zipper is often easier to install. Excess length can be trimmed after the zipper has been secured.
What seam allowance should I use?
Approximately 3/8 inch (1 cm) works well for the main construction. Around the zipper, approximately 1/4 inch (6 mm) is usually appropriate.
How do I keep the lining away from the zipper teeth?
Press the lining away from the zipper and add a line of topstitching close to the seam.
Why should I leave the zipper partially open?
The open zipper provides access for turning the project right side out after the main seams are completed.
How are boxed corners made?
Align the side and bottom seams at each corner, flatten the fabric into a triangle, mark a perpendicular line, stitch across it, and trim the excess.
Can I make the bag deeper?
Yes. Larger boxed corners create more depth, although they also reduce the finished height and width slightly.
Can I add interior pockets?
Absolutely. Sew pockets onto the lining panels before assembling the lining.
Can the inside be water resistant?
You can use an appropriate water-resistant lining fabric. Remember that ordinary seams and zippers do not make the finished bag completely waterproof.
Can I quilt the exterior?
Yes. Sandwich exterior fabric with batting or foam and quilt it before cutting or assembling the final panels.
Can I use patchwork for the exterior?
Definitely. Piece scraps together first, press the patchwork panel, reinforce it with interfacing, and then cut the required exterior shapes.
How do I make the side handle stronger?
Apply lightweight interfacing inside the handle strip and reinforce the attachment points with additional stitching.
Can I add handles on both sides?
Yes. Simply prepare two matching loops and baste one to each side before sewing the exterior seams.
How can I resize the pattern?
Increase or decrease the main panels proportionally. Remember that changing the boxed-corner measurement will also change the final depth.
What can I store inside the finished bag?
It works well for toiletries, makeup, brushes, sewing notions, craft supplies, travel accessories, chargers, and other small personal items.
Conclusion
The Fabric Toiletry Bag Pattern is a practical project that teaches several valuable sewing techniques while producing an accessory you can actually use every day. Starting with simple rectangular fabric pieces, you can build a structured bag with a zipper closure, lining, boxed corners, and a convenient carrying handle.
For the version described here, the main exterior and lining pieces begin at approximately 11 × 8 inches (28 × 20 cm). A 12-inch (30 cm) zipper, interfacing or stabilizer, and a small fabric strip for the handle complete the basic materials.
Installing the zipper carefully is one of the most important stages. Sandwiching it between the exterior and lining creates clean interior seams, while topstitching prevents fabric from interfering with the zipper teeth. Leaving the zipper partially open before final assembly also makes turning much easier.
The boxed corners are what transform this project from a simple flat zipper pouch into a spacious toiletry bag. Accurate corner measurements on both the exterior and lining help produce the balanced rectangular silhouette seen in the inspiration.
Once you master this construction method, you can customize the Fabric Toiletry Bag Pattern almost endlessly. Try floral cotton, bold solids, patchwork scraps, quilted panels, contrasting zippers, decorative handles, interior pockets, or different dimensions to create your own collection.
I hope this tutorial helps you create a beautiful and functional handmade toiletry bag. After completing your Fabric Toiletry Bag Pattern, leave your sincere opinion about the project and share your suggestions for colors, fabrics, sizes, pockets, or other features you would like to add to your next version.