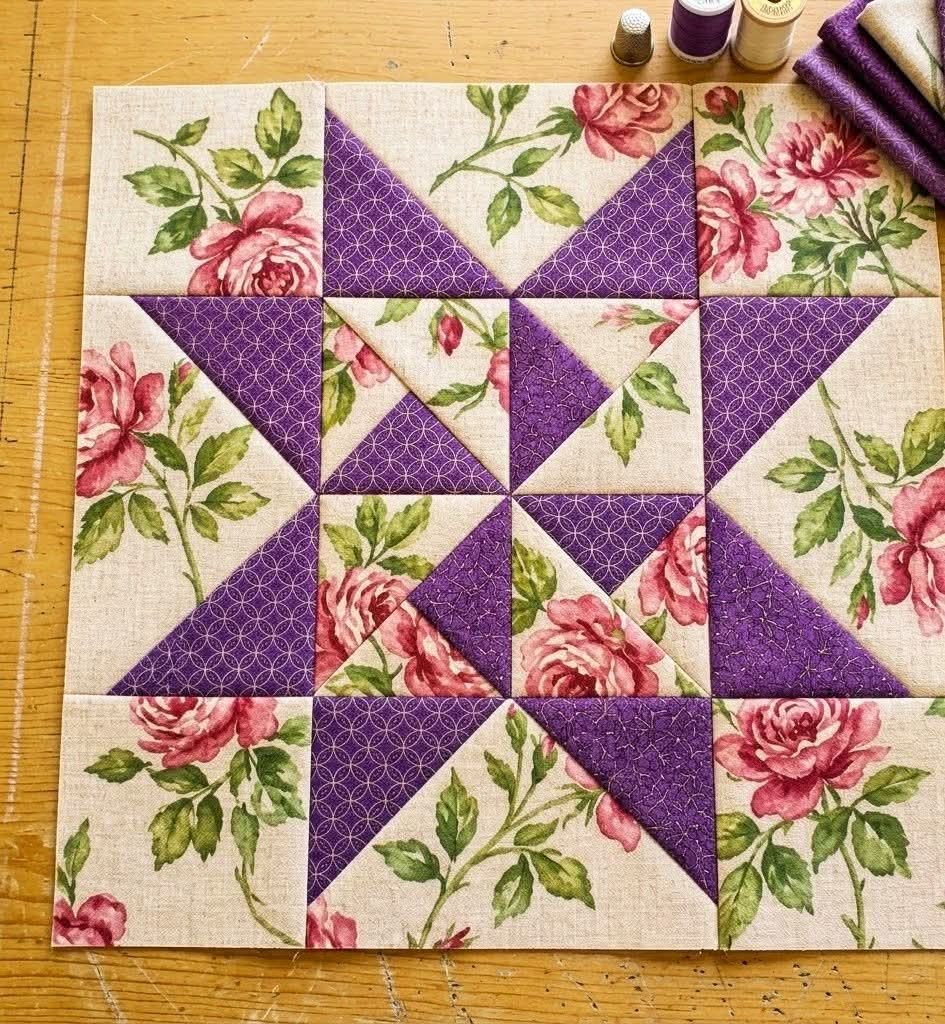
The Pinwheel Star Quilt Block – PATTERN is a beautiful and timeless quilting design that combines movement, symmetry, and classic patchwork charm. Whether you are a beginner learning quilt block construction or an experienced quilter looking for a versatile and eye-catching pattern, creating a Pinwheel Star Quilt Block – PATTERN can be both enjoyable and rewarding.
Making a Pinwheel Star Quilt Block – PATTERN allows you to transform simple fabric pieces into a dynamic geometric design filled with energy and visual balance. This quilt block is perfect for full-size quilts, table runners, wall hangings, pillow covers, and seasonal home décor projects.
One of the best things about the Pinwheel Star Quilt Block – PATTERN is its flexibility. You can create traditional, modern, or even bold artistic versions simply by changing your fabric colors and layout choices. It is also a fantastic way to practice accurate cutting and precise piecing while creating something truly stunning. In this guide, we will explore how to make this quilt block step by step.
1. Choosing the Best Fabrics for a Pinwheel Star Quilt Block
Selecting the right materials is the first step in creating a beautiful Pinwheel Star Quilt Block – PATTERN. Since this design relies heavily on contrast and shape definition, fabric selection is especially important.
DISCOVER MORE FREE PATTERNS HERE!
Cotton quilting fabric is the most recommended choice because it is stable, easy to cut, and provides crisp seam lines. It also presses beautifully, which helps maintain the sharp geometry of the block.
Choose contrasting colors to help the pinwheel and star shapes stand out clearly. Light and dark combinations work especially well for creating movement and visual depth.
Solid fabrics create a clean modern appearance, while prints can add personality and a more traditional patchwork style. Small prints often work better than large prints because they preserve the visibility of the design.
Using pre-cut fabric squares can save time and improve accuracy, especially for beginners working on their first Pinwheel Star Quilt Block – PATTERN.
You will also need matching thread, rotary cutters, rulers, pins, and an iron to ensure clean construction and precise seam pressing.
2. Understanding the Pinwheel Star Layout and Block Structure
Before starting the sewing process, it is important to understand how the Pinwheel Star Quilt Block – PATTERN is usually built. This block combines pinwheel motion with star-point symmetry to create a striking visual effect.
The center of the block often features a pinwheel design created using half-square triangles or small square units arranged to create rotational movement.
Around the center, star points are formed using triangles, flying geese units, or carefully placed square sections that radiate outward like a star.
The combination of spinning pinwheel energy and structured star framing creates a balanced design that looks both playful and elegant.
Precision is very important because even small cutting errors can affect the alignment of points and corners. Careful measuring helps maintain a polished final look.
Understanding the structure first helps ensure your Pinwheel Star Quilt Block – PATTERN comes together smoothly and looks professionally finished.
3. Step-by-Step Sewing Process for the Quilt Block
Once your materials are ready, it is time to begin your Pinwheel Star Quilt Block – PATTERN. Taking your time during cutting and assembly will improve the final result significantly.
Start by cutting all fabric pieces according to your chosen block size. Most patterns include squares, triangles, or rectangles depending on the exact star variation.
Create the half-square triangles first if your pattern uses them for the pinwheel center. Sew the paired squares diagonally, trim excess fabric, and press seams carefully.
Arrange the pinwheel center pieces on a flat surface before sewing. This helps prevent rotation mistakes and ensures the spinning effect is visually correct.
Next, prepare the star point sections using flying geese units or triangle combinations. Lay everything out before stitching so the overall design remains balanced.
Sew the block together row by row, pressing seams after each step. Accurate seam allowances help all points align neatly and improve the final appearance.
Finally, square up the completed block using a ruler to ensure it matches the intended dimensions and is ready for joining into a larger quilt project.
4. Decorating and Personalizing Your Pinwheel Star Quilt Block
The finishing stage is where your Pinwheel Star Quilt Block – PATTERN becomes truly unique. Personal touches allow you to transform a classic design into a signature handmade creation.
Color placement has a major impact on the final look. Bright bold colors create dramatic movement, while soft neutrals offer a calm and elegant traditional style.
Seasonal themes work beautifully with this pattern. Red and green combinations are perfect for holiday quilts, while pastel shades create lovely spring and baby quilt designs.
Scrap quilting is another wonderful option. Using leftover fabric pieces gives the block a playful patchwork personality and makes every block slightly different.
Decorative quilting stitches added later can enhance the spinning effect of the pinwheel and emphasize the star points with extra texture.
Borders and sashing between blocks can also change the final quilt dramatically, helping frame each Pinwheel Star Quilt Block – PATTERN beautifully.
The beauty of this block lies in its versatility. Every finished version reflects the maker’s creativity, color choices, and quilting style.
FAQ About Pinwheel Star Quilt Block – PATTERN
Is the Pinwheel Star Quilt Block beginner-friendly?
Yes, many versions are suitable for confident beginners, especially those using simple half-square triangles. More detailed versions with flying geese may require intermediate skills.
What size should the quilt block be?
Common block sizes range from 8 inches to 16 inches, depending on the project. Smaller blocks create more detail, while larger blocks are easier for beginners.
What fabrics work best for this pattern?
Cotton quilting fabric is the best choice because it provides stability, easy cutting, and clean seam lines for precise piecing.
Can I use scraps for this block?
Yes, this pattern is excellent for scrap quilting. Small leftover fabric pieces work beautifully for the pinwheel and star sections.
Why are my points not matching?
This usually happens because of uneven seam allowances or inaccurate cutting. Careful measuring and consistent quarter-inch seams help solve this problem.
Can I sell quilts made with this block?
Yes, many quilters create and sell finished quilts, table runners, and decorative items using the Pinwheel Star Quilt Block – PATTERN with great success.
Conclusion
Creating a Pinwheel Star Quilt Block – PATTERN is a wonderful way to combine quilting precision, geometric beauty, and personal creativity into one stunning handmade project. From choosing the right fabrics and understanding the layout to sewing the pinwheel center and star points, every step contributes to a polished and visually dynamic result.
This project is perfect for quilts, home décor, gifts, seasonal decorations, or even small quilting business opportunities. A well-made quilt block carries charm and craftsmanship that machine-made designs often cannot replicate.
PATTERN VIDEO
We hope this guide has helped you understand how to create your own Pinwheel Star Quilt Block – PATTERN with confidence and inspiration. If you have already made one or plan to start soon, please leave your honest opinion and share your suggestions—we would love to hear your creative ideas and experiences.