
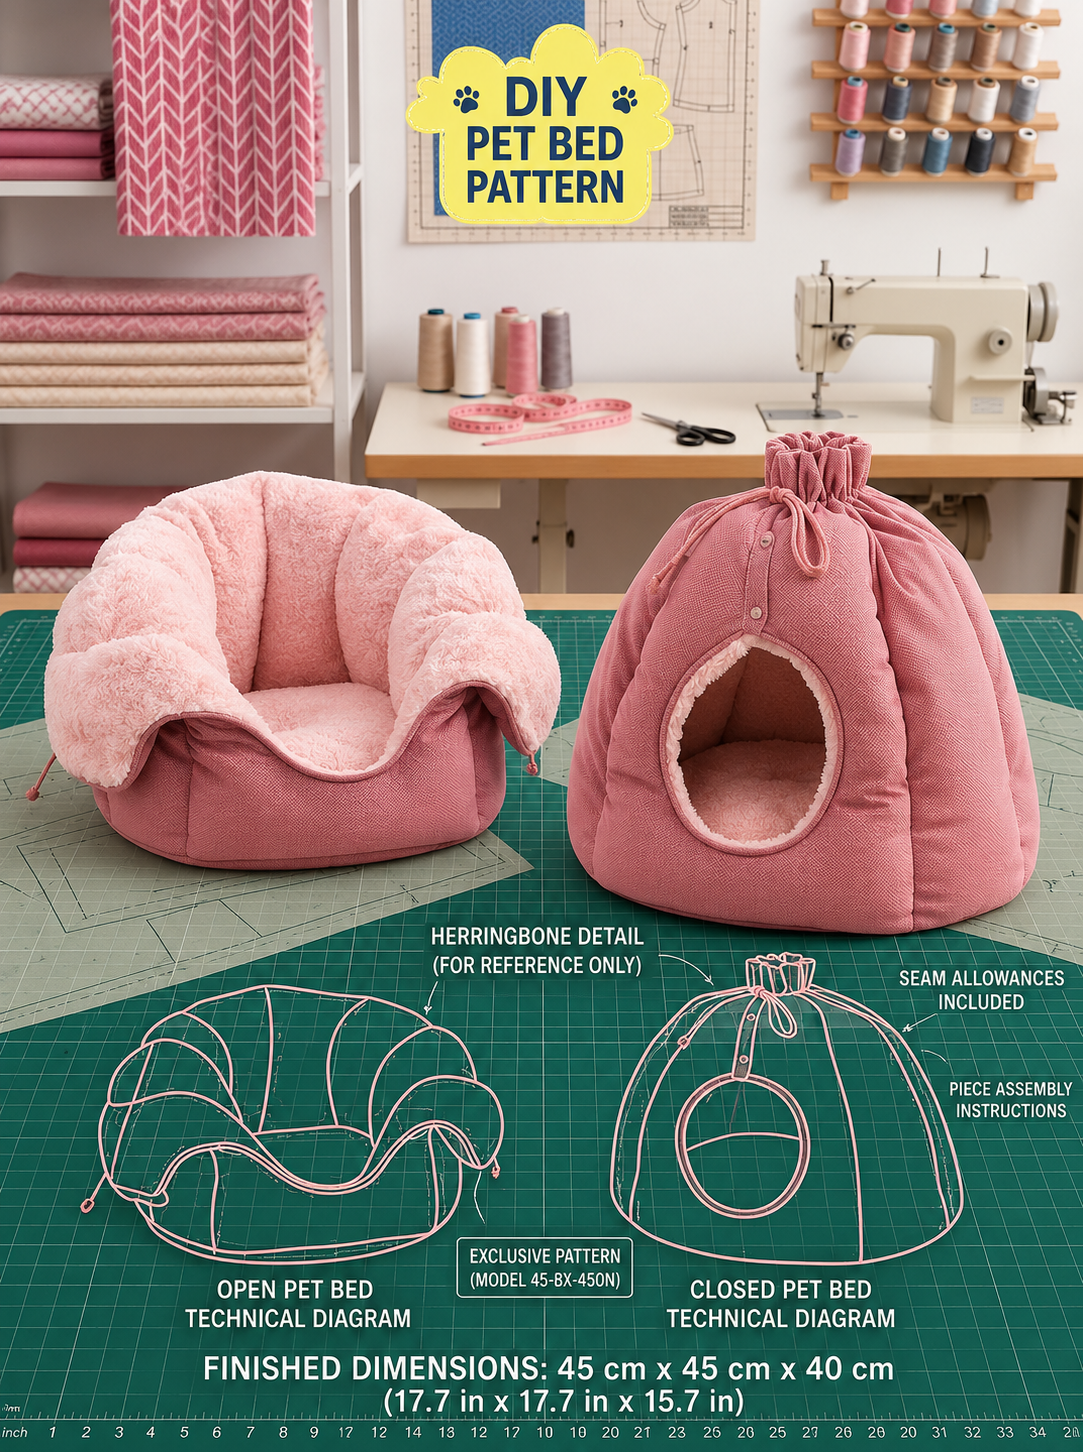
DIY Pet Bed Pattern is the perfect project for sewists who want to create a soft, durable, and personalized resting place for their furry companions. Whether you have a playful kitten, a small dog, or a senior pet that enjoys extra comfort, this DIY Pet Bed Pattern combines functionality with beautiful handmade style. Using basic quilting and sewing techniques, you can create either an open cushioned bed or a cozy enclosed pet cave that provides warmth, security, and comfort throughout the year.
One of the greatest advantages of making your own DIY Pet Bed Pattern is the freedom to customize every detail. You can select fabrics that match your home décor, choose luxurious plush linings for extra softness, increase or reduce the size to fit your pet perfectly, and even add removable washable cushions. Handmade pet beds are often more durable than mass-produced versions because you control the quality of every material used.
Although the finished bed looks professionally constructed, this project is approachable for confident beginners and experienced quilters alike. Throughout this guide, you’ll learn how to choose suitable fabrics, prepare the pattern pieces, sew the structure, insert padding, assemble both the open and enclosed versions, finish the seams professionally, and create a comfortable bed that your pet will love using every day.
Choosing Materials for Your DIY Pet Bed Pattern
The success of your DIY Pet Bed Pattern begins with selecting durable, pet-friendly materials. Medium-weight quilting cotton, canvas, cotton duck, upholstery-weight linen blends, denim, or home décor fabric all provide excellent structure for the outer shell. For the interior lining, soft fleece, minky, sherpa, plush fabric, or microfiber creates an inviting sleeping surface.
DISCOVER MORE FREE PATTERNS HERE!
Choose fabrics that are machine washable and resistant to frequent cleaning. Pets naturally shed hair, carry outdoor dirt, and occasionally have accidents, so washable fabrics make long-term maintenance much easier while extending the life of the finished bed.
You’ll also need high-quality polyester fiberfill, foam inserts, batting, or shredded memory foam depending on your preferred level of firmness. Polyester fiberfill creates a lightweight bed, while foam offers additional orthopedic support for older pets.
Gather your sewing supplies before beginning. Essential tools include sharp fabric scissors, rotary cutter, quilting ruler, measuring tape, sewing clips, pins, coordinating thread, sewing machine, heavy-duty needles, washable fabric marker, iron, and optional piping or decorative trim for finishing.
Prewash all fabrics before cutting. Washing removes shrinkage and softens the fabric while ensuring the finished DIY Pet Bed Pattern maintains its intended size after future laundering.
Finally, transfer the pattern pieces carefully onto your fabric. Accurate cutting ensures the curved panels fit together smoothly, creating symmetrical sides and a professional appearance in both the open and enclosed versions.
Cutting and Sewing the Main Structure
Begin the DIY Pet Bed Pattern by cutting all body panels according to your selected size. Organize each section before sewing to simplify the assembly process and reduce mistakes during construction.
If you’re making the open pet bed, sew the side panels together first, forming a continuous outer ring. Press each seam open after stitching to reduce bulk and help maintain smooth curves around the bed.
For the enclosed pet cave version, join each vertical panel carefully, aligning the curved top edges evenly. Gradually assembling each section creates the rounded dome shape while keeping the entrance centered and symmetrical.
Once the exterior shell is complete, repeat the same process with the lining fabric. Constructing the lining separately allows for clean interior finishes and provides a neat professional appearance once assembled.
Layer the exterior, batting if desired, and lining according to the construction sequence. Secure all layers using quilting clips or temporary basting stitches before final assembly. This prevents shifting while sewing the curved sections.
Leave the recommended turning or stuffing openings where required by your pattern. Careful planning during this stage makes inserting filling much easier and produces smoother finished seams throughout the DIY Pet Bed Pattern.
Adding Support, Padding, and Final Assembly
One of the most important features of the DIY Pet Bed Pattern is comfortable cushioning. Fill the side walls evenly using polyester fiberfill or insert foam panels if greater structural support is desired. Even distribution creates consistent comfort and prevents lumpy sections.
Construct the removable cushion separately whenever possible. A removable insert simplifies cleaning while allowing replacement if the cushion becomes worn over time. Add a zipper or envelope-style closure for convenience.
For enclosed pet caves, insert additional batting or foam between the fabric layers to help the dome maintain its rounded shape. Reinforcing the upper structure prevents the entrance from collapsing during everyday use.
Secure the base panel carefully to the side walls using strong seams. Because the base supports your pet’s weight daily, reinforce these seams with a second row of stitching for improved durability.
After assembling the main structure, close all remaining openings using either invisible hand stitching or narrow machine seams. Trim loose threads and inspect the entire bed for consistent shaping.
Lightly fluff the filling with your hands to distribute it evenly throughout the finished DIY Pet Bed Pattern, ensuring maximum comfort before allowing your pet to enjoy its new resting place.
Customization Ideas and Care Tips
The DIY Pet Bed Pattern offers countless opportunities for customization. Coordinate fabrics with your home’s interior décor, seasonal themes, or your pet’s personality by selecting playful prints, floral fabrics, solids, gingham, or modern geometric patterns.
Consider adding removable washable covers for easier maintenance. Zippered covers allow you to wash only the outer fabric while keeping the internal cushion protected and extending the bed’s lifespan.
Personalization is another wonderful feature. Embroider your pet’s name, applique paw prints, quilt decorative motifs, or add contrast piping to create a one-of-a-kind handmade accessory.
For older pets, consider adding orthopedic foam beneath the cushion to improve joint support. Extra padding can significantly increase comfort for senior dogs and cats that spend long periods resting.
Wash the finished bed according to the fabric manufacturer’s recommendations. Regular cleaning keeps the DIY Pet Bed Pattern fresh, hygienic, and inviting for your pet while preserving the fabric’s appearance.
Most importantly, observe how your pet uses the bed. Some pets enjoy extra blankets, while others prefer firmer cushions. Handmade projects allow you to adjust future versions based on your pet’s unique preferences.
Frequently Asked Questions
Is the DIY Pet Bed Pattern suitable for beginners?
Yes. Confident beginners with basic sewing experience can complete this project by following the pattern step by step.
What fabrics work best?
Canvas, quilting cotton, denim, upholstery fabric, fleece, sherpa, and plush fabrics all work beautifully.
Can I make different sizes?
Absolutely. The pattern can easily be resized for cats, puppies, medium dogs, or larger breeds.
Which filling should I use?
Polyester fiberfill is lightweight, while foam or shredded memory foam provides greater orthopedic support.
Can I make the cushion removable?
Yes. A removable cushion is highly recommended for easier cleaning and long-term maintenance.
How often should I wash the bed?
Most pet beds benefit from regular washing every few weeks or whenever visibly soiled, depending on your pet’s activity level.
Can I add a waterproof layer?
Yes. Waterproof lining placed beneath the removable cover helps protect the inner filling from moisture.
Is this a good handmade gift?
Definitely. A handmade DIY Pet Bed Pattern makes a thoughtful gift for pet owners and is also a popular item for craft fairs and handmade marketplaces.
Conclusion
The DIY Pet Bed Pattern is a rewarding sewing project that combines comfort, creativity, and practical design into one beautiful handmade accessory for your beloved pet. Throughout this tutorial, you’ve learned how to select durable materials, prepare and cut the pattern pieces, assemble the structure, add supportive padding, construct both open and enclosed bed styles, and personalize the finished project with thoughtful details.
Whether you’re sewing a cozy cave for a cat, a cushioned lounge for a small dog, or creating handmade gifts for fellow pet lovers, the DIY Pet Bed Pattern offers endless opportunities for creativity while producing a durable and comfortable resting place your pet will enjoy for years.
If you enjoyed this DIY Pet Bed Pattern tutorial, we’d love to hear from you. Please leave your honest opinion, share your sewing experience, and let us know your suggestions for future quilting and sewing projects. Your feedback helps inspire new ideas and supports a growing community of passionate handmade creators.